The Best Fluffy Pancakes recipe you will fall in love with. Full of tips and tricks to help you make the best pancakes.

Mini desserts for parties are the little treats that pack a big punch! Whether you’re hosting a gathering or just looking to add some sweetness to your celebration, these bite-sized delights make it easy for guests to indulge without overdoing it. From tiny tarts to decadent mini cakes, there’s something for every palate. Get ready to elevate your dessert game with these fun, portable options that are sure to be a hit at any event!
Chocolate Mousse Cups
Contents
- Chocolate Mousse Cups
- Chocolate-Dipped Strawberries
- Mini S’mores in a Jar
- Lemon Curd Tartlets
- Mini Cheesecake Bites
- Mini Cupcake Assortment
- Fruit Tartlets with Pastry Cream
- Petite Fours with Delicate Icing
- Banana Pudding Shooters
- Mini Eclairs with Cream Filling
- Macarons in Assorted Flavors
- Cheesecake Pops on Sticks
- Coconut Macaroons with Chocolate Drizzle
- Mini Tiramisu Cups
- Peanut Butter Chocolate Truffles
- Mini Pumpkin Pie Cups
- Mini Fruit Sorbet Cups
- Pineapple Upside-Down Cake Bites
- Raspberry Cream Puffs
- Mini Pavlovas with Fresh Berries
- Chocolate Chip Cookie Dough Bites
- Spiced Apple Crisp Bites
- Chocolate-Covered Pretzel Rods
- Mini Almond Joy Cheesecakes
- Vanilla Pudding Parfaits
- Lavender Honey Madeleines
- Mini Pecan Pie Tartlets
- Mini Key Lime Pies
- Chocolate Chip Brownie Bites
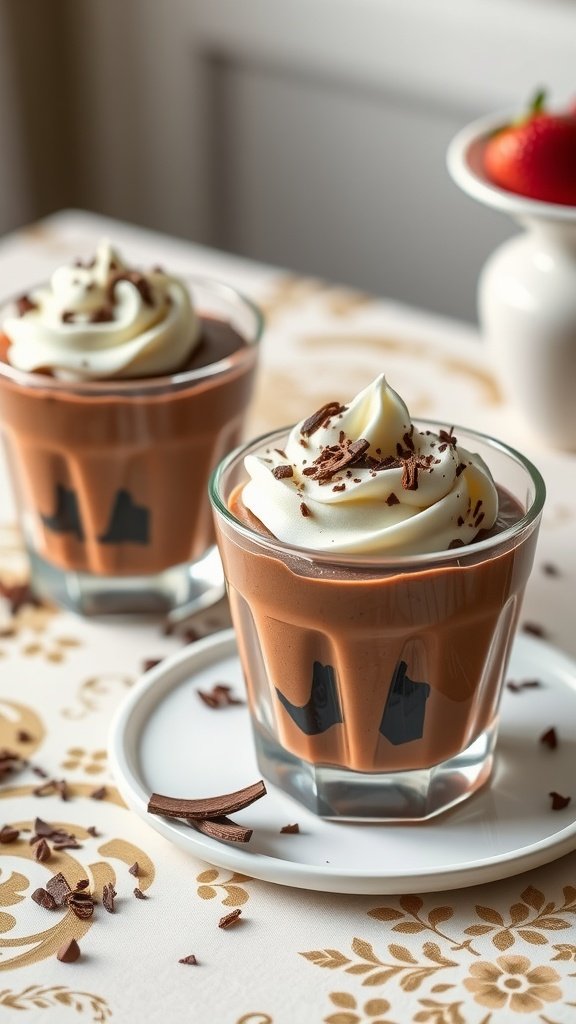
Chocolate mousse cups are a delightful treat that combines the richness of chocolate with a light, airy texture. This dessert is perfect for mini desserts for parties, allowing guests to indulge in a sweet bite without feeling too heavy. Each spoonful is a luscious experience that balances sweetness with a hint of bitterness from the chocolate.
The great thing about chocolate mousse is how simple it is to prepare. With just a few basic ingredients, you can whip up a dessert that looks elegant and tastes divine, making it a fantastic choice for any gathering.
Ingredients
- 1 cup heavy cream
- 1/2 cup semi-sweet chocolate chips
- 2 tablespoons sugar
- 1 teaspoon vanilla extract
- 1/2 cup whipped cream (for topping)
- Chocolate shavings (for garnish)
Instructions
- Melt the Chocolate: In a microwave-safe bowl, melt the chocolate chips in 30-second intervals, stirring until smooth. Allow to cool slightly.
- Whip the Cream: In a mixing bowl, beat the heavy cream, sugar, and vanilla extract until soft peaks form.
- Combine: Gently fold the melted chocolate into the whipped cream until fully combined, being careful not to deflate the mixture.
- Chill: Spoon the mousse into small cups or glasses and refrigerate for at least 2 hours to set.
- Serve: Top each cup with whipped cream and chocolate shavings just before serving.
Chocolate-Dipped Strawberries

Chocolate-dipped strawberries are a delightful treat that combines the sweetness of fresh fruit with the richness of chocolate. These mini desserts for parties are not only visually appealing but also incredibly simple to make, making them a go-to option for any gathering.
The juicy strawberries are perfectly complemented by a smooth chocolate coating, creating a delightful contrast in flavors and textures. Whether you’re hosting a party or just looking for a sweet snack, these chocolate-dipped strawberries are always a crowd-pleaser.
Ingredients
- 1 pound fresh strawberries, washed and dried
- 8 ounces semi-sweet chocolate, chopped
- 1 tablespoon coconut oil (optional, for smoothness)
- Optional toppings: crushed nuts, sprinkles, or sea salt
Instructions
- Prepare the Strawberries: Make sure the strawberries are completely dry, as water can affect the chocolate coating.
- Melt the Chocolate: In a microwave-safe bowl, combine the chopped chocolate and coconut oil. Heat in 30-second intervals, stirring in between, until fully melted and smooth.
- Dip the Strawberries: Hold each strawberry by the stem and dip it into the melted chocolate, swirling to coat evenly. Let the excess chocolate drip off.
- Add Toppings: If desired, sprinkle your choice of toppings onto the wet chocolate before it sets.
- Chill: Place the dipped strawberries on a parchment-lined baking sheet and refrigerate for about 30 minutes or until the chocolate hardens.
- Serve: Arrange the chocolate-dipped strawberries on a serving platter and enjoy!
Mini S’mores in a Jar
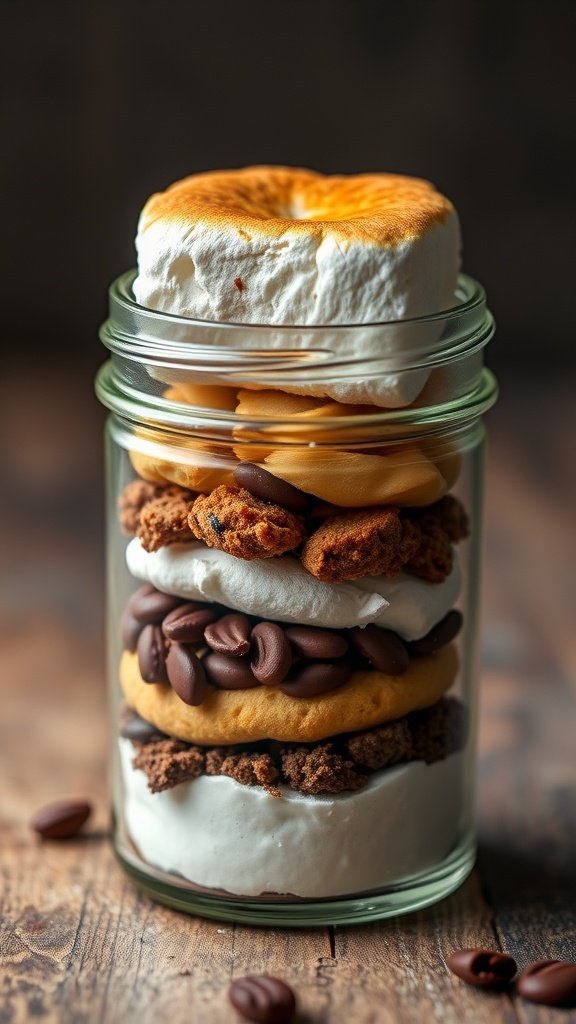
Mini s’mores in a jar combine the classic flavors of chocolate, marshmallow, and graham crackers into a fun and portable dessert. These little treats are not only delightful to eat but also super easy to assemble, making them perfect for any gathering.
The layers of creamy marshmallow fluff, rich chocolate, and crunchy graham crackers create a tasty balance that everyone will love. Plus, they are visually appealing, making them an excellent choice for mini desserts for parties!
Ingredients
- 1 cup marshmallow fluff
- 1 cup chocolate ganache (chocolate melted with cream)
- 1 cup crushed graham crackers
- 1/2 cup mini chocolate chips
- 1/2 cup mini marshmallows
- Additional graham cracker pieces for garnish
Instructions
- Prepare the jars: Use small mason jars for layering your ingredients.
- Layer 1: Start with a layer of crushed graham crackers at the bottom of each jar.
- Layer 2: Add a layer of chocolate ganache over the graham crackers.
- Layer 3: Spoon a layer of marshmallow fluff on top of the ganache.
- Repeat layers: Continue layering the ingredients until you reach the top of the jar, finishing with marshmallow fluff.
- Garnish: Top with mini marshmallows and a few graham cracker pieces for decoration.
- Chill: Refrigerate the jars for at least 30 minutes to set before serving.
Lemon Curd Tartlets
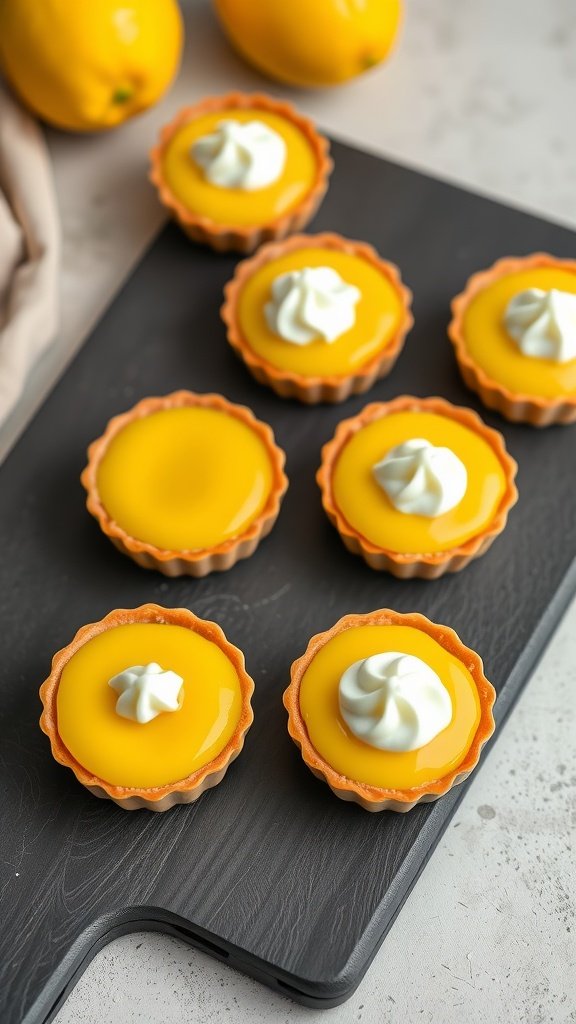
Lemon curd tartlets are delightful little bites that bring a burst of tangy flavor to any occasion. With their crispy crust and creamy lemon filling, these mini desserts for parties offer a perfect balance of sweetness and tartness, making them a crowd favorite. Plus, they’re surprisingly easy to whip up, so you can spend less time in the kitchen and more time enjoying the party!
The buttery tart shell complements the smooth lemon curd beautifully, while a dollop of whipped cream on top adds a touch of elegance. These tartlets are not only delicious but also visually appealing, making them a charming addition to your dessert table. Whether it’s a birthday bash, holiday gathering, or a casual get-together, these lemon curd tartlets will surely steal the show.
Ingredients
- 1 cup all-purpose flour
- 1/4 cup unsalted butter, softened
- 2 tablespoons powdered sugar
- 1/4 teaspoon salt
- 1 large egg yolk
- 1/4 cup fresh lemon juice
- 1/2 cup granulated sugar
- 2 large eggs
- 1 tablespoon lemon zest
- 1/4 cup heavy cream (for topping)
- 1 tablespoon powdered sugar (for whipped cream)
Instructions
- Make the Tart Shells: In a bowl, mix flour, butter, powdered sugar, and salt until crumbly. Add the egg yolk and mix until a dough forms. Press dough into mini tartlet pans and chill for 30 minutes.
- Bake the Shells: Preheat the oven to 350°F (175°C). Place tartlet pans on a baking sheet and bake for 15-18 minutes until lightly golden. Let them cool completely.
- Prepare the Lemon Curd: In a saucepan, whisk together lemon juice, granulated sugar, eggs, and lemon zest over medium heat. Stir constantly until thickened, about 8-10 minutes. Remove from heat and let it cool.
- Fill the Tart Shells: Once the lemon curd is cool, pour it into the prepared tart shells, filling them to the top.
- Make the Whipped Cream: In a bowl, whip heavy cream with powdered sugar until soft peaks form. Pipe or dollop over the cooled tartlets before serving.
Mini Cheesecake Bites
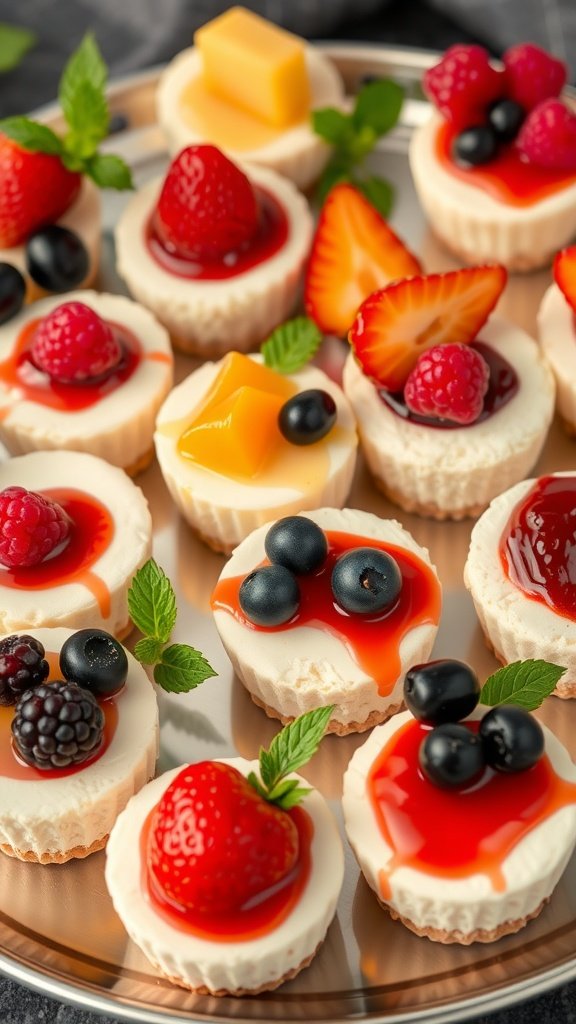
Mini cheesecake bites are delightful little treats that pack all the creamy goodness of traditional cheesecake into bite-sized portions. These mini desserts for parties are not only visually appealing but also satisfy your sweet tooth without overwhelming you. The blend of smooth cream cheese with a hint of sweetness, topped with fresh fruits or fruit sauces, makes each bite a tasty experience.
What’s more, they’re simple to make! With just a few ingredients and straightforward steps, you can whip up a batch that will impress your guests. Perfect for gatherings, they allow everyone to indulge without the fuss of slicing a larger cheesecake. Let’s dive into the recipe!
Ingredients
- 1 1/2 cups graham cracker crumbs
- 1/4 cup granulated sugar
- 1/2 cup unsalted butter, melted
- 16 oz cream cheese, softened
- 1 cup powdered sugar
- 1 teaspoon vanilla extract
- 2 large eggs
- Assorted toppings (fresh berries, fruit sauces, or chocolate)
Instructions
- Prepare the Crust: Preheat your oven to 325°F (160°C). In a bowl, mix graham cracker crumbs, sugar, and melted butter until combined. Press the mixture into the bottom of mini muffin tins to form the crusts.
- Mix the Filling: In a large mixing bowl, beat the softened cream cheese until smooth. Gradually add the powdered sugar and vanilla, mixing until well combined. Add the eggs one at a time, beating until just blended.
- Fill the Tins: Pour the cheesecake filling over the prepared crusts, filling each cup about 3/4 full.
- Bake: Place the muffin tins in the oven and bake for 15-20 minutes or until the centers are set. Remove from the oven and let cool completely.
- Top and Serve: Once cooled, add your choice of toppings, like fresh berries or fruit sauces, and refrigerate until ready to serve. Enjoy your mini cheesecake bites!
Mini Cupcake Assortment

Mini cupcakes are the ultimate crowd-pleasers when it comes to mini desserts for parties. These bite-sized treats are not only adorable but also packed with flavor, making them perfect for any occasion. Each cupcake can be customized with different flavors and colorful frosting, appealing to both kids and adults alike.
Making a mini cupcake assortment is a breeze! You can whip these up quickly, and they don’t require any fancy techniques. Just mix, bake, and decorate! Plus, with various flavor combinations, there’s something for everyone to enjoy.
Ingredients
- 1 cup all-purpose flour
- 1/2 cup granulated sugar
- 1/2 teaspoon baking powder
- 1/4 teaspoon salt
- 1/2 cup unsalted butter, softened
- 2 large eggs
- 1 teaspoon vanilla extract
- 1/4 cup milk
- Assorted food coloring
- Various toppings (sprinkles, fruits, chocolate chips)
Instructions
- Preheat the oven to 350°F (175°C) and line a mini cupcake pan with liners.
- In a mixing bowl, combine flour, sugar, baking powder, and salt. Add the softened butter, eggs, vanilla extract, and milk. Beat on medium speed until the batter is smooth.
- Divide the batter into smaller bowls and add food coloring to each for variety. Mix well.
- Spoon the colored batter into the lined cupcake pan, filling each cup about two-thirds full.
- Bake for 12-15 minutes or until a toothpick inserted into the center comes out clean. Let them cool completely.
- Once cooled, decorate each cupcake with frosting and your choice of toppings.
Fruit Tartlets with Pastry Cream
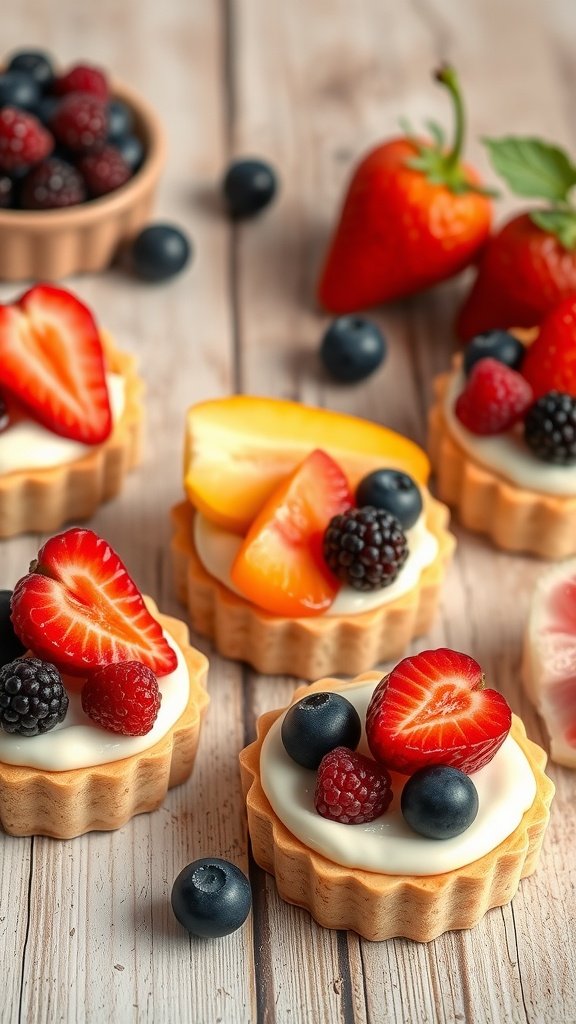
Fruit tartlets with pastry cream are a delightful mini dessert for parties that combines a crisp, buttery crust with a smooth and creamy filling. Topped with fresh fruit, these little treats are both visually appealing and delicious, making them a hit at any gathering. They’re pretty simple to make, requiring only a few key ingredients, and they can be prepared ahead of time, allowing you to enjoy the party just as much as your guests.
The contrast between the crunchy tart shell and the velvety pastry cream, along with the burst of flavor from the fresh fruit, creates a satisfying dessert experience. Whether you choose berries, peaches, or a mix of seasonal fruits, each bite is refreshing and light—perfect for celebrating special occasions!
Ingredients
- 1 cup all-purpose flour
- 1/4 cup powdered sugar
- 1/2 cup unsalted butter, chilled and cubed
- 1 large egg yolk
- 2 tablespoons cold water
- 2 cups milk
- 1/2 cup granulated sugar
- 1/4 cup cornstarch
- 2 large eggs
- 1 teaspoon vanilla extract
- Fresh fruits (strawberries, blueberries, raspberries, peaches, etc.)
Instructions
- Make the Tart Shells: In a mixing bowl, combine flour and powdered sugar. Add the cubed butter and mix until crumbly. Stir in the egg yolk and cold water until the dough comes together. Wrap in plastic wrap and chill for 30 minutes.
- Preheat the Oven: Preheat your oven to 350°F (175°C). Roll out the chilled dough on a floured surface and cut into circles to fit your tartlet pans. Press the dough into the pans and prick the bottoms with a fork.
- Bake the Tart Shells: Bake the tart shells for about 15-20 minutes or until golden. Allow them to cool completely.
- Prepare the Pastry Cream: In a saucepan, heat the milk over medium heat. In a separate bowl, whisk together sugar, cornstarch, eggs, and vanilla. Once the milk is hot, slowly pour it into the egg mixture while whisking. Return the mixture to the saucepan and cook until thickened, stirring constantly. Remove from heat and cool.
- Assemble the Tartlets: Fill each cooled tart shell with pastry cream and top generously with fresh fruits. Serve immediately or refrigerate until ready to serve.
Petite Fours with Delicate Icing
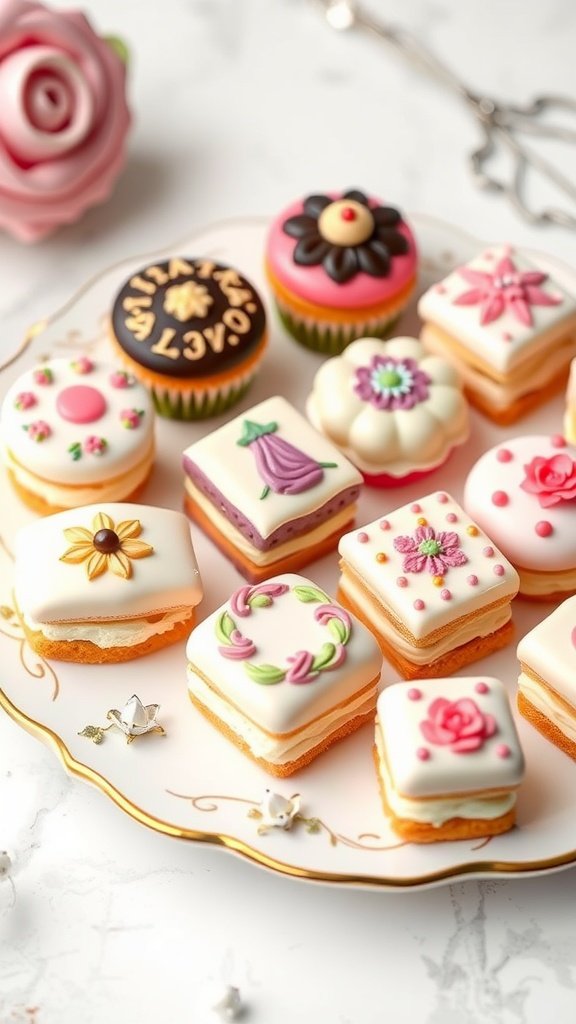
Petite fours are delightful mini desserts that are perfect for adding a touch of elegance to any party. These small, layered treats are often filled with rich creams or fruit preserves and are covered in a delicate icing that not only looks beautiful but also offers a sweet bite. They strike a lovely balance between being indulgent and light, making them a favorite at celebrations.
Making petite fours is simpler than you might think. With just a few ingredients and some basic techniques, you can create these charming mini desserts for parties that will impress your guests. They can be customized with different flavors and decorations, making them as unique as your event.
Ingredients
- 1 1/2 cups all-purpose flour
- 1 cup granulated sugar
- 1/2 cup unsalted butter, softened
- 3 large eggs
- 1 teaspoon vanilla extract
- 1/2 teaspoon baking powder
- 1/4 teaspoon salt
- 1 cup powdered sugar
- 2-3 tablespoons milk
- Food coloring (optional)
- Decorative icing (for topping)
Instructions
- Preheat your oven to 350°F (175°C) and grease a 9×13-inch baking pan.
- In a large bowl, cream together the softened butter and sugar until light and fluffy. Beat in the eggs one at a time, followed by the vanilla extract.
- In another bowl, whisk together the flour, baking powder, and salt. Gradually add the dry ingredients to the wet mixture, mixing until just combined.
- Pour the batter into the prepared pan and smooth the top. Bake for 25-30 minutes, or until a toothpick inserted into the center comes out clean. Allow to cool completely.
- Once cool, cut the cake into small squares. For the icing, mix powdered sugar with milk until you reach a smooth consistency. If using food coloring, divide the icing into bowls and add colors as desired.
- Dip the tops of the cake squares into the icing, letting the excess drip off. Decorate with additional icing if you wish. Allow to set before serving.
Banana Pudding Shooters
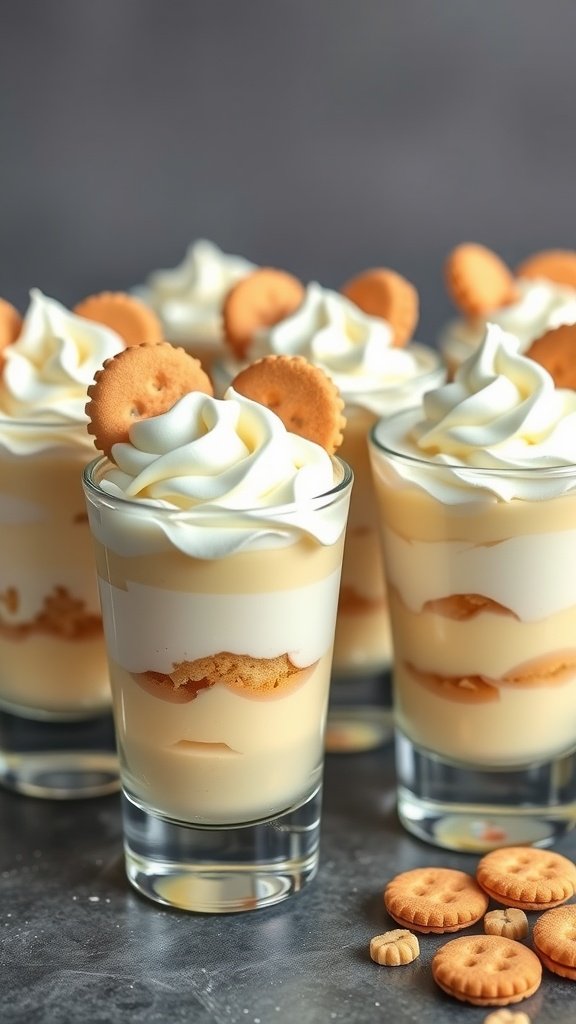
Banana pudding shooters are a delightful way to enjoy a classic dessert in mini form. These creamy treats are layered with smooth banana pudding, whipped cream, and crunchy vanilla wafers, making them a perfect sweet bite for any gathering. They taste rich and satisfying while still being light enough to leave room for more treats!
Simple to prepare, these mini desserts for parties are as easy as layering the ingredients in small cups. They bring a fun and interactive element to your dessert table, allowing guests to enjoy a delicious combination of flavors in a cute and portable format.
Ingredients
- 2 ripe bananas, sliced
- 1 box (3.4 oz) instant vanilla pudding mix
- 2 cups milk
- 1 cup whipped cream (store-bought or homemade)
- 1 cup vanilla wafers, crushed
- Extra vanilla wafers for garnishing
Instructions
- Prepare the Pudding: In a large bowl, whisk together the instant pudding mix and milk until smooth. Let it sit for about 5 minutes to thicken.
- Layer the Ingredients: In small cups, start by adding a layer of crushed vanilla wafers at the bottom. Next, add a layer of the prepared banana pudding, followed by a layer of sliced bananas. Top with a dollop of whipped cream.
- Repeat the Layers: Continue layering the ingredients until the cups are filled, finishing with a layer of whipped cream on top.
- Garnish: Add a vanilla wafer on top of each shooter for an extra touch. Chill in the refrigerator for at least 30 minutes before serving to allow the flavors to meld.
Mini Eclairs with Cream Filling

Mini eclairs are delightful little treats that bring a touch of elegance to any gathering. With a light, airy pastry filled with smooth cream and topped with a drizzle of chocolate, they offer a perfect balance of flavors. These mini desserts for parties are not only delicious but also simple to make, making them a favorite among bakers of all skill levels.
Whether you’re hosting a birthday bash or a casual get-together, mini eclairs are sure to impress your guests. Their bite-sized nature makes them perfect for mingling, and their creamy filling provides a satisfying treat without being too heavy. Let’s dive into making these tasty delights!
Ingredients
- 1 cup water
- 1/2 cup unsalted butter
- 1 cup all-purpose flour
- 1/4 teaspoon salt
- 4 large eggs
- 1 cup heavy cream
- 1/4 cup powdered sugar
- 1 teaspoon vanilla extract
- 4 ounces dark chocolate, melted
Instructions
- Preheat the oven to 400°F (200°C). Line a baking sheet with parchment paper.
- In a saucepan, bring water and butter to a boil. Stir in flour and salt until the mixture pulls away from the sides of the pan.
- Remove from heat and let it cool slightly. Beat in eggs one at a time until the dough is smooth.
- Spoon or pipe the dough onto the prepared baking sheet into small oval shapes.
- Bake for 20-25 minutes until golden brown. Allow to cool completely.
- In a bowl, whip the heavy cream, powdered sugar, and vanilla until stiff peaks form.
- Slice the cooled eclairs in half and fill each with the whipped cream mixture.
- Drizzle melted chocolate over the filled eclairs and let it set before serving.
Macarons in Assorted Flavors
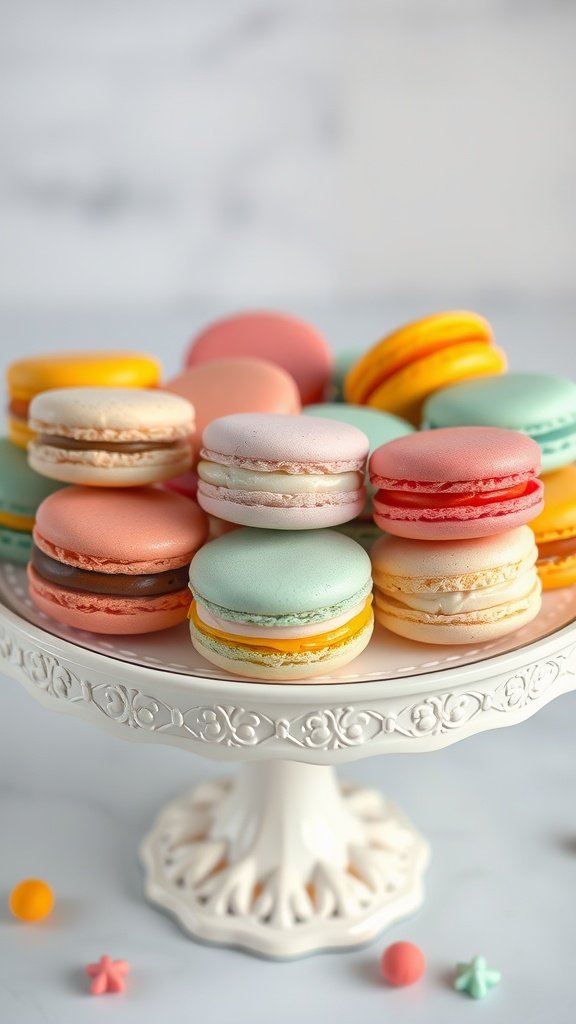
Macarons are delightful little treats that add a touch of elegance to any gathering. These colorful French cookies are made from almond flour, egg whites, and sugar, resulting in a light, airy texture that melts in your mouth. Each macaron can be filled with a variety of flavors, such as chocolate ganache, fruit preserves, or buttercream, making them a versatile choice for mini desserts for parties.
While they might appear fancy, making macarons can be quite straightforward with the right technique. A little patience is required, but the end result is definitely worth it. Not only do they taste amazing, but they also look beautiful arranged on a platter, making them a hit at any event.
Ingredients
- 1 cup almond flour
- 1 3/4 cups powdered sugar
- 3 large egg whites
- 1/4 cup granulated sugar
- 1 teaspoon vanilla extract
- Food coloring (optional)
- Filling of choice (buttercream, ganache, or jam)
Instructions
- Preheat your oven to 300°F (150°C) and line a baking sheet with parchment paper.
- In a bowl, sift together the almond flour and powdered sugar to remove lumps.
- In a separate bowl, beat the egg whites until foamy. Gradually add the granulated sugar and continue beating until stiff peaks form.
- Gently fold the dry mixture into the egg whites, being careful not to deflate the batter. If using, add food coloring to reach your desired shade.
- Transfer the batter to a piping bag and pipe small circles onto the prepared baking sheet, leaving space between each.
- Let the macarons sit at room temperature for about 30 minutes until a skin forms on top.
- Bake for 15-20 minutes, then let cool completely before filling with your choice of filling.
Cheesecake Pops on Sticks

Cheesecake pops are a delightful twist on traditional cheesecake. They offer a creamy, dreamy cheesecake filling coated in smooth chocolate and adorned with tasty toppings. These mini desserts for parties are not only easy to eat but also visually appealing, making them a hit at any gathering.
Making cheesecake pops is a simple process that doesn’t require advanced baking skills. With just a few steps, you can create these sweet treats that are sure to impress your guests. Whether you’re planning a birthday party or a casual get-together, these pops will be the perfect addition!
Ingredients
- 1 1/2 cups cream cheese, softened
- 1/2 cup granulated sugar
- 1 teaspoon vanilla extract
- 1 cup crushed graham crackers
- 1 cup chocolate chips (milk or dark)
- 1 tablespoon coconut oil (optional)
- Lollipop sticks
Instructions
- Mix the Filling: In a bowl, beat together the softened cream cheese, sugar, and vanilla extract until smooth. Stir in the crushed graham crackers until well combined.
- Form the Pops: Scoop small amounts of the mixture and roll into balls. Place them on a baking sheet lined with parchment paper. Insert lollipop sticks into each ball and freeze for about 1-2 hours until firm.
- Prepare the Coating: Melt the chocolate chips in a microwave-safe bowl, adding coconut oil if desired for a smoother consistency. Stir until melted and smooth.
- Coat the Pops: Remove the pops from the freezer and dip each one into the melted chocolate, allowing excess to drip off. Place back on the parchment paper.
- Add Toppings: While the chocolate is still wet, sprinkle with additional crushed graham crackers or any toppings of your choice.
- Chill Again: Return the pops to the freezer for another 30 minutes to set the chocolate.
Coconut Macaroons with Chocolate Drizzle

Coconut macaroons are delightful little treats that bring a tropical twist to any gathering. With their chewy texture and sweet coconut flavor, they’re the kind of mini desserts for parties that everyone loves. Topped with a rich chocolate drizzle, they strike the perfect balance between coconut sweetness and chocolate decadence.
Making these macaroons is quite simple, requiring just a handful of ingredients and minimal effort. They bake up quickly and can be prepared ahead of time, allowing you to focus on enjoying the party!
Ingredients
- 14 ounces sweetened shredded coconut
- 1/2 cup granulated sugar
- 1/4 cup all-purpose flour
- 1/4 teaspoon salt
- 4 large egg whites
- 1 teaspoon vanilla extract
- 4 ounces semi-sweet chocolate, chopped
Instructions
- Preheat the oven to 325°F (165°C). Line a baking sheet with parchment paper.
- In a large bowl, combine shredded coconut, sugar, flour, and salt. Mix well.
- Add egg whites and vanilla extract to the coconut mixture. Stir until everything is well combined.
- Using a tablespoon or cookie scoop, drop spoonfuls of the mixture onto the prepared baking sheet, spacing them about 1 inch apart.
- Bake for 20-25 minutes or until the tops are golden brown. Allow to cool completely on the baking sheet.
- Melt the chopped chocolate in a microwave-safe bowl, heating in 30-second intervals until smooth. Drizzle the chocolate over the cooled macaroons using a fork or piping bag.
- Let the chocolate set before serving. Enjoy your coconut macaroons as a delightful mini dessert!
Mini Tiramisu Cups
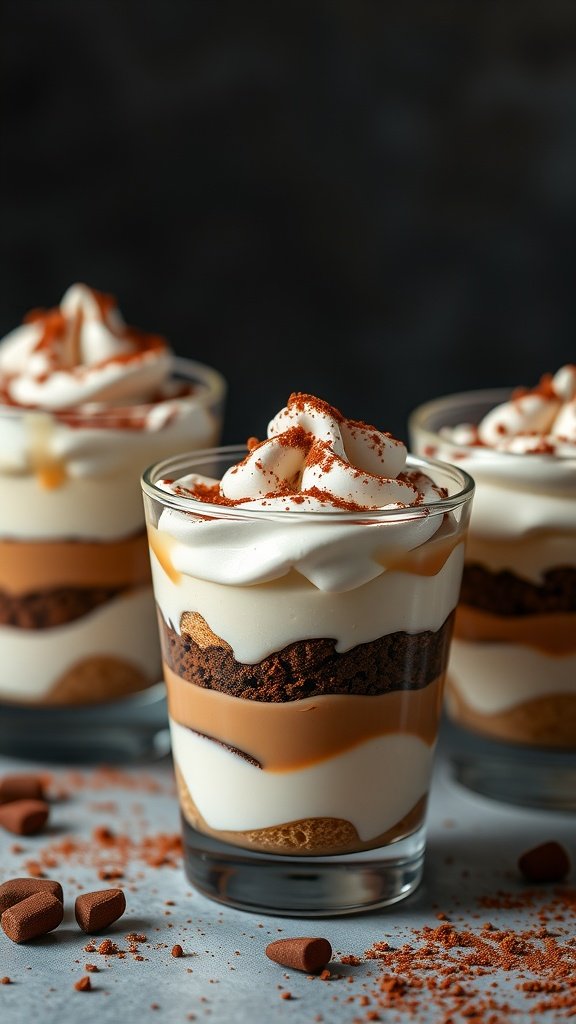
If you’re looking for a delightful addition to your next gathering, mini tiramisu cups are where it’s at! These charming little desserts combine layers of coffee-soaked ladyfingers, rich mascarpone cream, and a sprinkle of cocoa powder for that authentic tiramisu flavor. They taste creamy and indulgent, with just the right amount of coffee to give you a little kick.
What’s great about mini tiramisu cups is how simple they are to prepare. You can whip them up in no time, and their individual servings make them perfect for parties. Plus, they look so cute on the dessert table!
Ingredients
- 1 cup strong brewed coffee, cooled
- 2 tablespoons coffee liqueur (optional)
- 1 cup mascarpone cheese
- 1 cup heavy whipping cream
- 1/4 cup granulated sugar
- 1 teaspoon vanilla extract
- 24 ladyfingers
- Cocoa powder for dusting
Instructions
- Prepare the Coffee: In a bowl, mix the cooled brewed coffee with coffee liqueur, if using. Set aside.
- Create the Cream: In a separate bowl, whip together mascarpone cheese, heavy cream, sugar, and vanilla extract until soft peaks form.
- Layer the Cups: Quickly dip ladyfingers one by one into the coffee mixture and layer them in small cups. Add a layer of the mascarpone cream on top. Repeat the process until the cups are full.
- Chill: Cover and refrigerate the cups for at least 4 hours, allowing the flavors to meld together.
- Serve: Just before serving, dust the tops with cocoa powder for a finishing touch.
Peanut Butter Chocolate Truffles

If you’re looking for a sweet treat that’s both satisfying and easy to make, peanut butter chocolate truffles are a delightful option. These bite-sized mini desserts for parties combine the rich, creamy flavor of peanut butter with a smooth chocolate coating, offering a perfect balance of sweetness and indulgence.
These truffles are not only tasty but also simple to whip up. With just a few ingredients and minimal prep time, you can create a crowd-pleaser that everyone will enjoy. Perfect for gatherings, they provide a chocolatey bite that will leave you wanting more!
Ingredients
- 1 cup creamy peanut butter
- 1/2 cup powdered sugar
- 1/4 cup unsweetened cocoa powder
- 1 teaspoon vanilla extract
- 1 cup semi-sweet chocolate chips
- 1 tablespoon coconut oil (optional)
Instructions
- Mix the Filling: In a bowl, combine creamy peanut butter, powdered sugar, cocoa powder, and vanilla extract. Stir until the mixture is smooth and forms a thick dough.
- Shape the Truffles: Using your hands, roll the mixture into small balls, about 1 inch in diameter. Place the balls on a parchment-lined baking sheet and refrigerate for 30 minutes to firm up.
- Melt the Chocolate: In a microwave-safe bowl, combine semi-sweet chocolate chips and coconut oil (if using). Microwave in 30-second intervals, stirring in between, until the chocolate is completely melted and smooth.
- Coat the Truffles: Dip each peanut butter ball into the melted chocolate, ensuring they’re fully coated. Return them to the baking sheet and let the excess chocolate drip off.
- Chill Again: Refrigerate the truffles for about 15-20 minutes until the chocolate coating sets. Serve chilled or at room temperature.
Mini Pumpkin Pie Cups
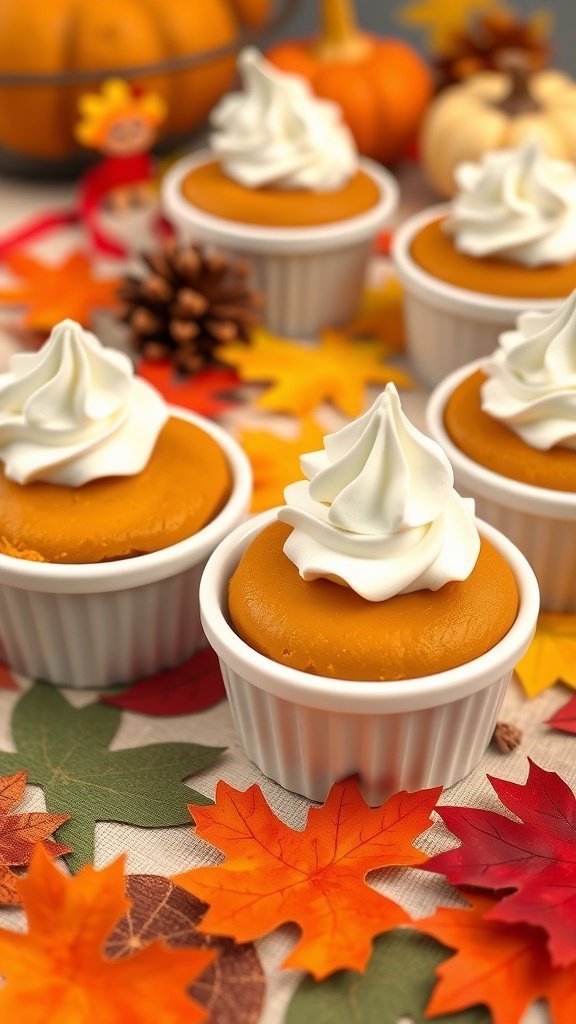
These Mini Pumpkin Pie Cups are perfect for any gathering, combining the classic flavors of pumpkin pie into a bite-sized treat. With a creamy filling spiced with cinnamon and nutmeg, they deliver a rich and comforting taste that everyone will enjoy. Plus, they’re super easy to make, so you won’t be spending all day in the kitchen!
Ideal as mini desserts for parties, these cups can be made ahead of time, allowing you to focus on enjoying the occasion. Topped with a dollop of whipped cream, they add a festive touch and are sure to impress your guests!
Ingredients
- 1 cup pumpkin puree
- 1/2 cup sweetened condensed milk
- 1/2 teaspoon ground cinnamon
- 1/4 teaspoon ground nutmeg
- 1/8 teaspoon ground ginger
- 1/8 teaspoon salt
- 1 large egg
- 1 package mini phyllo pastry cups
- Whipped cream for topping
Instructions
- Preheat your oven to 350°F (175°C).
- In a mixing bowl, combine pumpkin puree, sweetened condensed milk, cinnamon, nutmeg, ginger, salt, and egg. Mix well until smooth.
- Place the mini phyllo pastry cups on a baking sheet and carefully fill each with the pumpkin mixture.
- Bake for 15-20 minutes, or until the filling is set.
- Let them cool, then top each cup with a dollop of whipped cream before serving.
Mini Fruit Sorbet Cups
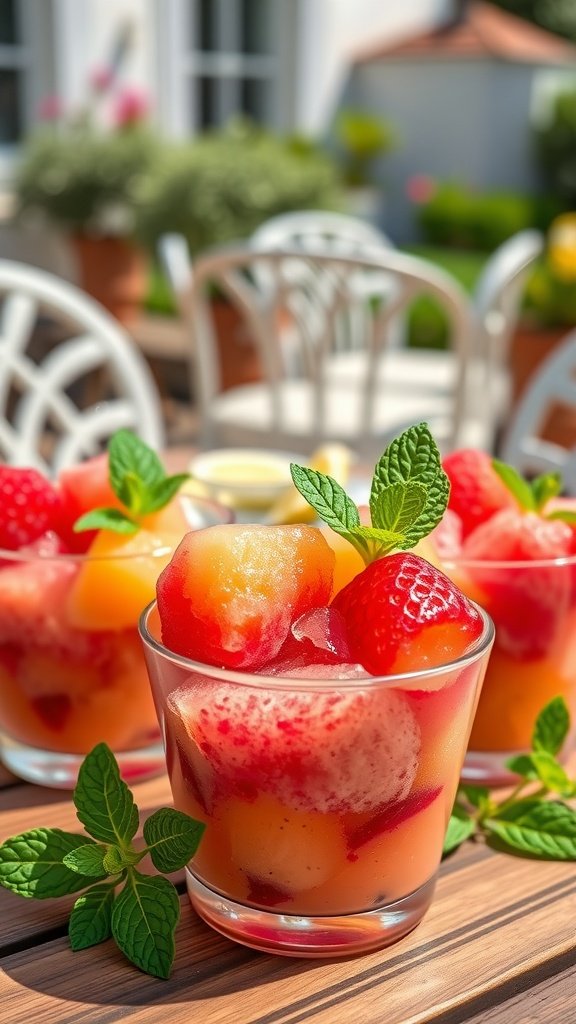
Mini fruit sorbet cups are a delightful way to introduce a refreshing treat at your next gathering. These little cups are bursting with fruity flavors and provide a light, cool dessert option that everyone can enjoy. They are easy to make and can be customized with your favorite fruits, making them a hit for mini desserts for parties.
With just a few simple ingredients, you can whip up these sorbet cups in no time. They’re perfect for warm weather gatherings or as a palate cleanser between courses. Serve them in small cups for an elegant touch that guests will love!
Ingredients
- 2 cups fresh fruit (strawberries, mangoes, peaches, etc.)
- 1/4 cup granulated sugar
- 1 cup fruit juice (orange, apple, or any preferred flavor)
- 1 tablespoon lemon juice
- Fresh mint leaves for garnish
Instructions
- Blend the Fruit: In a blender, combine the fresh fruit, sugar, fruit juice, and lemon juice. Blend until smooth.
- Chill the Mixture: Pour the mixture into a bowl and refrigerate for about 1 hour, allowing it to chill and the flavors to meld.
- Freeze the Sorbet: Transfer the mixture to a shallow dish and place it in the freezer. Every 30 minutes, stir the sorbet with a fork until it becomes fluffy and fully frozen.
- Serve: Once the sorbet is ready, scoop it into small cups and garnish with fresh mint leaves. Enjoy your mini fruit sorbet cups!
Pineapple Upside-Down Cake Bites

Pineapple Upside-Down Cake Bites are a delightful twist on the traditional dessert, making them a fun addition to your mini desserts for parties. These little cakes are sweet and moist, topped with juicy pineapple and a bright cherry. They combine the rich flavors of caramelized sugar and the freshness of fruit, creating a perfect bite-sized treat that everyone will love.
What makes these bites so appealing is how simple they are to make. You can whip them up quickly, and they hold their beautiful presentation well. They’re a fantastic way to impress your guests without spending hours in the kitchen!
Ingredients
- 1 cup all-purpose flour
- 1/2 cup granulated sugar
- 1/2 teaspoon baking powder
- 1/4 teaspoon salt
- 1/2 cup unsalted butter, softened
- 2 large eggs
- 1 teaspoon vanilla extract
- 1/2 cup crushed pineapple, drained
- 1/4 cup brown sugar
- 12 maraschino cherries
Instructions
- Preheat the Oven: Preheat your oven to 350°F (175°C). Grease a mini muffin pan.
- Make the Topping: In a small bowl, mix the brown sugar and crushed pineapple. Spoon a little of this mixture into the bottom of each muffin cup.
- Prepare the Batter: In a large bowl, combine flour, sugar, baking powder, and salt. In another bowl, beat together the softened butter, eggs, and vanilla until smooth. Gradually add the dry ingredients to the wet ingredients, mixing until just combined.
- Add the Batter: Spoon the batter over the pineapple mixture in the muffin pan, filling each cup about 2/3 full. Place a maraschino cherry on top of each bite.
- Bake: Bake for 15-20 minutes, or until a toothpick inserted comes out clean. Allow them to cool slightly before removing from the pan.
- Serve: Enjoy these delightful Pineapple Upside-Down Cake Bites warm or at room temperature!
Raspberry Cream Puffs
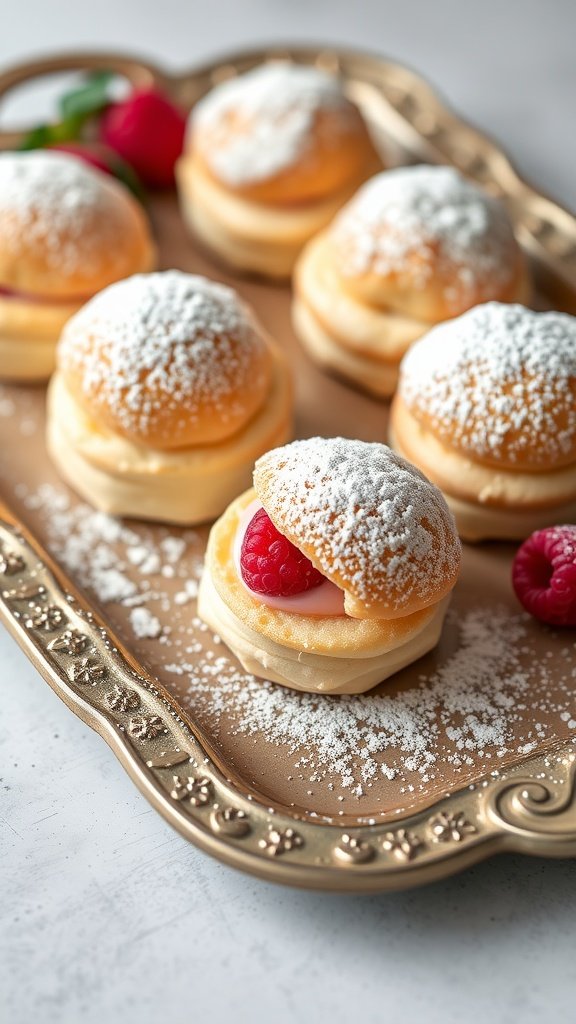
Raspberry cream puffs are delightful mini desserts for parties that combine light, airy pastry with rich, creamy filling. The balance of sweet cream and tart raspberry creates a flavor that’s both refreshing and indulgent. Plus, they’re simple enough to whip up, making them perfect for any gathering.
These little treats are not only visually appealing but also a breeze to assemble. With a bit of patience while preparing the choux pastry and the filling, you’ll have a batch of delicious cream puffs that will impress your guests without taking up your entire day in the kitchen. Let’s dive into the recipe!
Ingredients
- 1 cup water
- 1/2 cup unsalted butter
- 1 cup all-purpose flour
- 1/4 teaspoon salt
- 4 large eggs
- 1 cup heavy cream
- 1/4 cup powdered sugar
- 1 teaspoon vanilla extract
- 1 cup fresh raspberries
- Additional powdered sugar for dusting
Instructions
- Prepare the Choux Pastry: In a saucepan, combine water and butter over medium heat until the butter melts. Add flour and salt all at once, stirring until the mixture forms a ball. Remove from heat and let it cool slightly.
- Add Eggs: Gradually add the eggs, one at a time, mixing well after each addition until the dough is smooth and glossy.
- Bake the Puffs: Preheat the oven to 375°F (190°C). Pipe or spoon small mounds of the dough onto a baking sheet lined with parchment paper. Bake for 20-25 minutes until golden brown and puffed. Let cool.
- Make the Cream Filling: In a bowl, whip the heavy cream, powdered sugar, and vanilla extract until thick. Gently fold in fresh raspberries.
- Assemble: Slice the tops off the cooled cream puffs, fill with the raspberry cream mixture, and replace the tops. Dust with powdered sugar before serving.
Mini Pavlovas with Fresh Berries
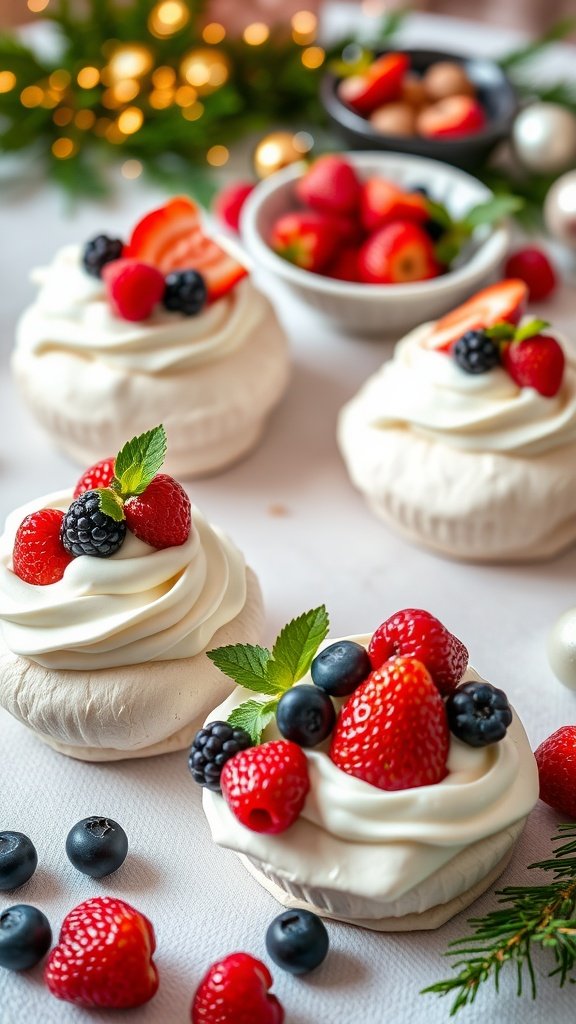
Mini pavlovas are charming little desserts that bring a delightful crunch and a soft, marshmallow-like center. Topped with whipped cream and an assortment of fresh berries, they offer a sweet and tangy flavor that pairs beautifully with the lightness of the meringue. These mini desserts for parties are not only visually appealing but also surprisingly simple to make, making them a great choice for any gathering.
The combination of crispy exterior and a soft interior creates a delightful texture, while the vibrant berries add a burst of freshness. Plus, they can be prepared ahead of time, allowing you to enjoy the festivities without the stress of last-minute baking!
Ingredients
- 4 large egg whites
- 1 cup granulated sugar
- 1 teaspoon white vinegar
- 1 teaspoon vanilla extract
- 1 cup heavy whipping cream
- 2 tablespoons powdered sugar
- 1 cup mixed fresh berries (strawberries, blueberries, raspberries, blackberries)
- Mint leaves for garnish (optional)
Instructions
- Preheat the oven to 225°F (110°C) and line a baking sheet with parchment paper.
- In a clean mixing bowl, beat the egg whites on medium speed until soft peaks form.
- Gradually add the granulated sugar, one tablespoon at a time, while continuing to beat until the mixture is glossy and stiff peaks form.
- Gently fold in the vinegar and vanilla extract.
- Spoon or pipe the meringue mixture into small discs on the prepared baking sheet, creating a slight indentation in the center for the filling.
- Bake for 1.5 hours, then turn off the oven and let the pavlovas cool completely inside.
- Once cooled, whip the heavy cream with powdered sugar until soft peaks form.
- Top each pavlova with whipped cream and a generous mix of fresh berries. Garnish with mint leaves if desired.
Chocolate Chip Cookie Dough Bites
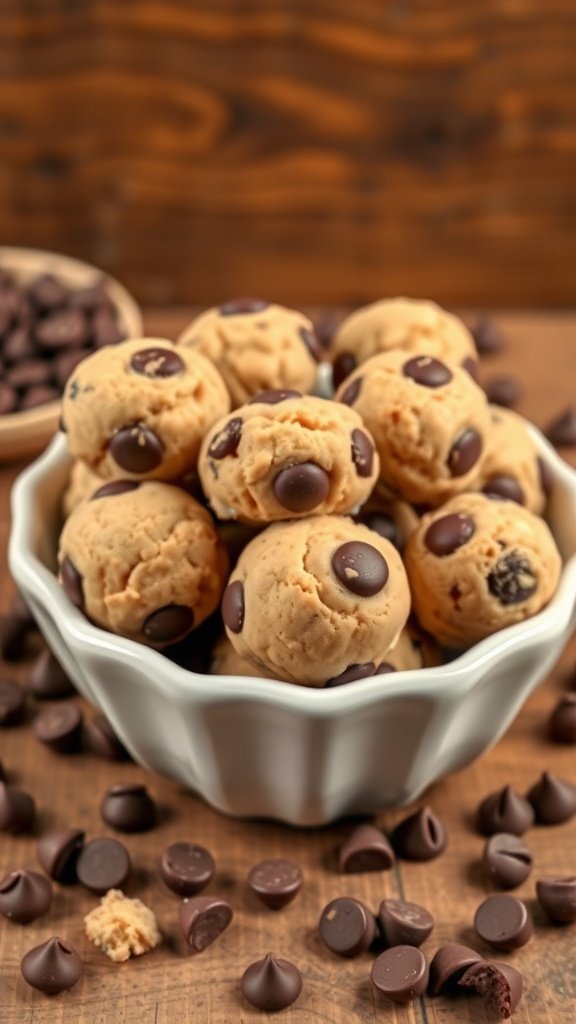
If you’re looking for a sweet treat that’s sure to impress at your next gathering, chocolate chip cookie dough bites are a delightful choice. These mini desserts offer all the indulgence of classic cookie dough, but in a bite-sized form that’s perfect for parties. They’re rich, creamy, and studded with chocolate chips, providing a satisfying crunch with every bite.
Making these cookie dough bites is simple and fun! You only need a handful of ingredients, and the process comes together quickly. Plus, since they’re no-bake, you can whip them up in no time, allowing you to spend more time enjoying your party. Your guests will love these little bites of sweetness!
Ingredients
- 1 cup all-purpose flour
- 1/2 cup unsalted butter, softened
- 1/2 cup brown sugar, packed
- 1/4 cup granulated sugar
- 1 teaspoon vanilla extract
- 1/2 teaspoon salt
- 1/4 cup mini chocolate chips
Instructions
- Prepare the Dough: In a large bowl, cream together the softened butter, brown sugar, and granulated sugar until smooth. Stir in the vanilla extract and salt.
- Add the Flour: Gradually mix in the all-purpose flour until well combined. Be sure to taste the dough to adjust sweetness if needed.
- Fold in the Chocolate Chips: Gently fold in the mini chocolate chips, ensuring they’re evenly distributed throughout the dough.
- Form the Bites: Use your hands to roll the dough into small balls, about one inch in diameter. Place them on a baking sheet lined with parchment paper.
- Chill: Refrigerate the cookie dough bites for at least 30 minutes to firm them up before serving.
- Serve and Enjoy: Once chilled, transfer them to a serving platter and watch them disappear!
Spiced Apple Crisp Bites
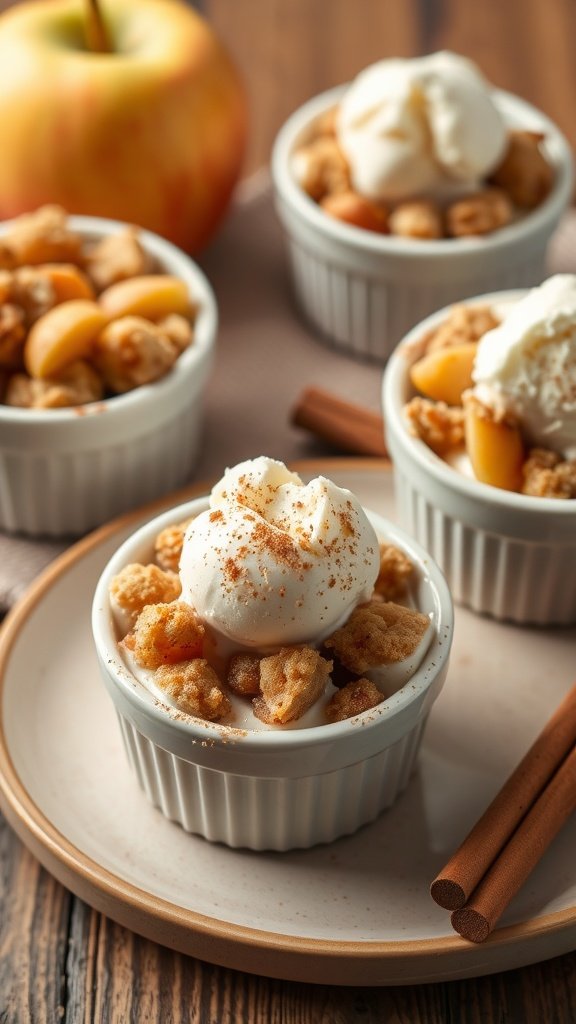
Spiced Apple Crisp Bites are delightful mini desserts that bring a warm and comforting flavor to any gathering. With tender apples, a hint of cinnamon, and a crispy topping, these little treats are both satisfying and easy to make. They strike the perfect balance between sweet and spiced, making them a hit at parties.
These bites are a breeze to prepare, allowing you to whip them up even on a busy day. Serve them warm with a scoop of vanilla ice cream or a dollop of whipped cream for an extra touch of indulgence. They’re a charming addition to your spread of mini desserts for parties, sure to please your guests!
Ingredients
- 2 cups diced apples
- 1 tablespoon lemon juice
- 1/2 teaspoon ground cinnamon
- 1/4 cup granulated sugar
- 1/2 cup rolled oats
- 1/4 cup all-purpose flour
- 1/4 cup brown sugar, packed
- 1/4 cup unsalted butter, melted
- 1/4 teaspoon salt
Instructions
- Preheat the oven to 350°F (175°C). In a bowl, toss the diced apples with lemon juice, cinnamon, and granulated sugar. Set aside.
- In another bowl, mix oats, flour, brown sugar, melted butter, and salt until crumbly. This will be your topping.
- Place the apple mixture into small ramekins or oven-safe cups, filling them halfway.
- Sprinkle the oat mixture generously on top of the apples.
- Bake for 20-25 minutes, until the apples are tender and the topping is golden brown.
- Serve warm with ice cream or whipped cream if desired.
Chocolate-Covered Pretzel Rods

Chocolate-covered pretzel rods are a delightful blend of sweet and salty flavors that make for a fun mini dessert for parties. They are easy to prepare and can be customized with different toppings for any occasion. The combination of crunchy pretzels and smooth chocolate creates a satisfying treat that everyone will love.
These pretzel rods are not only simple to make, but they also add a festive touch to any dessert table. Whether you’re throwing a birthday party or a holiday gathering, these treats are sure to impress your guests. Plus, they’re perfect for little hands to grab and enjoy!
Ingredients
- 1 cup chocolate chips (milk, dark, or white)
- 12 pretzel rods
- Sprinkles or chopped nuts for topping
- Parchment paper
Instructions
- Melt the Chocolate: In a microwave-safe bowl, heat the chocolate chips in 30-second intervals, stirring in between, until fully melted and smooth.
- Dip the Pretzels: Hold a pretzel rod by one end and dip the other half into the melted chocolate, covering about two-thirds of the rod.
- Add Toppings: Immediately sprinkle your choice of sprinkles or chopped nuts onto the chocolate-covered portion before it sets.
- Cool: Place the dipped pretzel rods on a sheet of parchment paper. Allow the chocolate to harden at room temperature or in the refrigerator for about 15-20 minutes.
- Serve: Once the chocolate is set, arrange the pretzel rods in a jar or on a serving platter. Enjoy your tasty treats!
Mini Almond Joy Cheesecakes
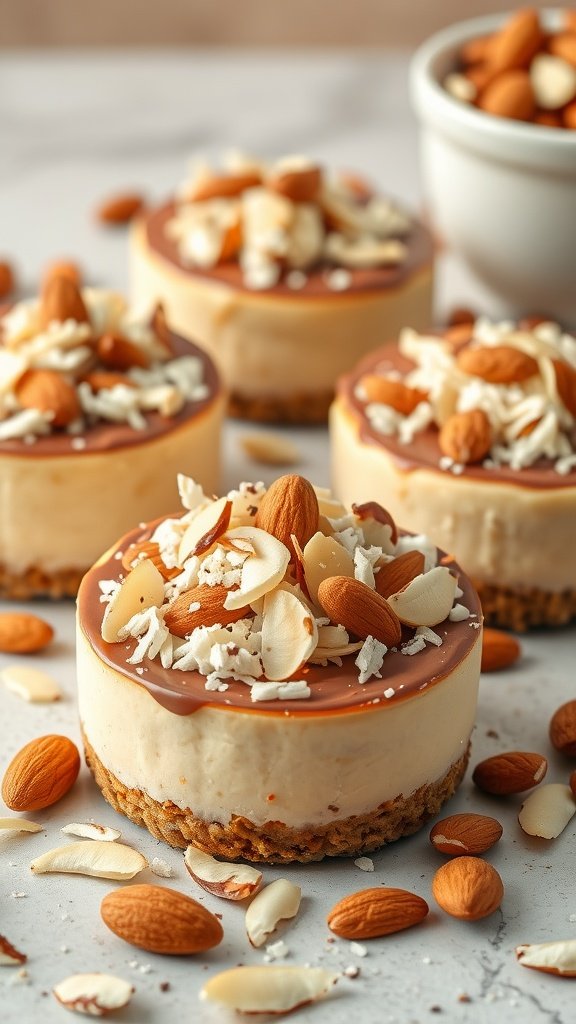
Mini Almond Joy Cheesecakes are a delightful treat that perfectly balance rich chocolate, creamy cheesecake, and crunchy almonds. These mini desserts for parties are not only tasty but also easy to make, ensuring you won’t spend all your time in the kitchen. Each bite offers a flavor reminiscent of the beloved candy bar, making them a hit among guests.
With a buttery crust and a smooth, sweet filling topped with chocolate and almond slices, these cheesecakes are sure to impress. The best part? They can be prepared ahead of time and chilled, ready to serve whenever you need them. Let’s dive into the recipe!
Ingredients
- 1 cup graham cracker crumbs
- 1/4 cup unsalted butter, melted
- 2 cups cream cheese, softened
- 3/4 cup granulated sugar
- 1 teaspoon vanilla extract
- 2 large eggs
- 1/2 cup shredded coconut
- 1/2 cup chocolate chips
- 1/2 cup sliced almonds
- 1/2 cup chocolate ganache (store-bought or homemade)
Instructions
- Preheat the oven to 325°F (160°C).
- In a mixing bowl, combine graham cracker crumbs and melted butter. Press the mixture into the bottom of a muffin tin lined with paper liners.
- In another bowl, beat the cream cheese and sugar until smooth. Add vanilla extract, then mix in the eggs one at a time until fully incorporated.
- Fold in the shredded coconut and chocolate chips. Spoon the cheesecake mixture over the crust in the muffin tin.
- Bake for 20-25 minutes, or until the centers are set. Let them cool completely before transferring to the refrigerator to chill for at least 2 hours.
- Before serving, drizzle the cheesecakes with chocolate ganache and top with sliced almonds.
Vanilla Pudding Parfaits

Vanilla pudding parfaits are a delightful treat that perfectly blend creamy textures with sweet flavors. These mini desserts for parties are not only easy to make but also visually appealing, making them a hit at any gathering.
With layers of smooth vanilla pudding, crumbled cookies, and whipped cream, each bite offers a satisfying crunch and sweetness. Plus, they’re customizable, so you can mix and match toppings to suit your taste!
Ingredients
- 2 cups milk
- 1/2 cup granulated sugar
- 1/4 cup cornstarch
- 1/4 teaspoon salt
- 1 teaspoon vanilla extract
- 1 cup heavy cream
- 2 tablespoons powdered sugar
- 1 cup crushed cookies (like Oreos)
- Maraschino cherries for garnish
Instructions
- Make the Pudding: In a saucepan, combine the milk, sugar, cornstarch, and salt. Cook over medium heat, stirring constantly until the mixture thickens and bubbles. Remove from heat and stir in the vanilla extract.
- Cool the Pudding: Pour the pudding into a bowl, cover with plastic wrap (to prevent a skin from forming), and let it cool completely.
- Whip the Cream: In a separate bowl, beat the heavy cream and powdered sugar together until soft peaks form.
- Assemble the Parfaits: In small cups or glasses, layer the pudding, crushed cookies, and whipped cream. Repeat the layers until the cups are filled.
- Garnish: Top each parfait with a dollop of whipped cream, a few crushed cookies, and a maraschino cherry.
Lavender Honey Madeleines

Lavender Honey Madeleines are a delightful twist on the classic French treat. With their light, buttery texture and subtle floral notes, these mini desserts are perfect for any gathering. The sweet hints of honey balance beautifully with the aromatic lavender, giving each bite a unique flavor that’s both refreshing and comforting.
Making these madeleines is surprisingly simple. With just a few basic ingredients and a silicone mold, you can whip up a batch in no time. They make for an elegant addition to any dessert table, especially when entertaining guests.
Ingredients
- 1/2 cup unsalted butter, melted
- 1/2 cup granulated sugar
- 3 large eggs
- 1 teaspoon vanilla extract
- 1 cup all-purpose flour
- 1 teaspoon baking powder
- 1 tablespoon culinary lavender, finely chopped
- 1/4 cup honey
- Powdered sugar for dusting
Instructions
- Preheat the oven to 350°F (175°C) and grease your madeleine mold.
- In a bowl, whisk together melted butter and sugar until well combined. Add in the eggs, one at a time, followed by the vanilla extract.
- In another bowl, sift together flour and baking powder, then fold into the wet mixture gently.
- Stir in the chopped lavender and honey until just combined.
- Spoon the batter into the prepared madeleine mold, filling each cavity about 3/4 full.
- Bake for 10-12 minutes or until the edges are golden. Let cool slightly before removing from the mold.
- Dust with powdered sugar before serving to add a touch of sweetness.
Mini Pecan Pie Tartlets
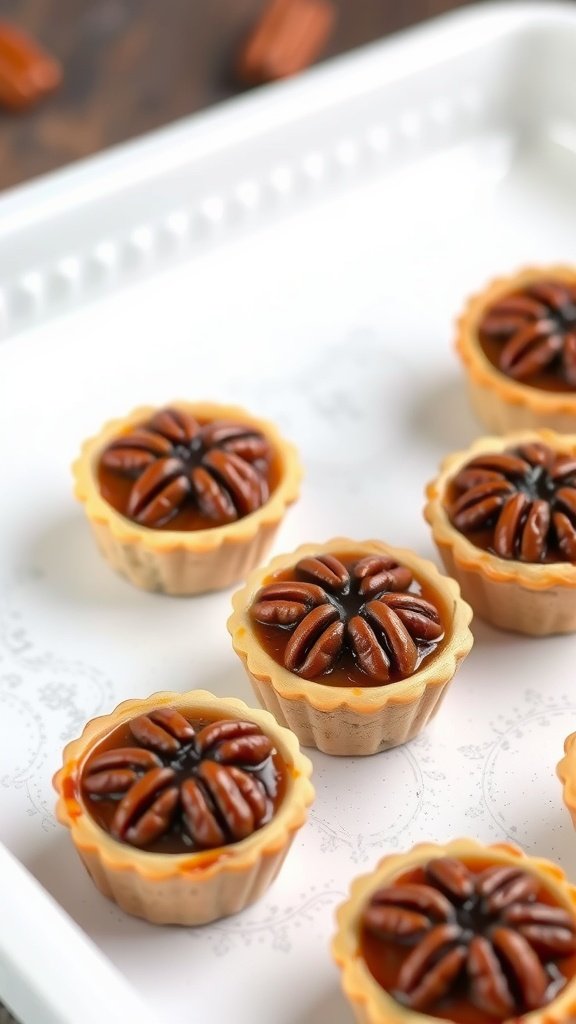
Mini Pecan Pie Tartlets are a delightful twist on the classic pecan pie, making them a perfect addition to any gathering. These bite-sized treats are filled with a rich, gooey filling and topped with crunchy pecans, offering a wonderful balance of textures and flavors. They’re not just delicious; they’re also simple to make, which means you can whip them up even on a busy day.
These tartlets are ideal mini desserts for parties, allowing guests to enjoy a taste of pecan pie without the fuss of slicing and serving. Their small size makes them easy to grab and savor, making them a hit at any event!
Ingredients
- 1 cup all-purpose flour
- 1/4 cup powdered sugar
- 1/2 cup unsalted butter, chilled and cubed
- 1/4 teaspoon salt
- 1 large egg yolk
- 1/4 cup brown sugar, packed
- 1/3 cup corn syrup
- 1 teaspoon vanilla extract
- 1/2 cup pecans, chopped
Instructions
- Make the Crust: In a bowl, mix flour, powdered sugar, and salt. Cut in the butter until mixture resembles coarse crumbs. Stir in egg yolk and mix until a dough forms. Press into mini tartlet pans and chill for 30 minutes.
- Preheat the Oven: Set your oven to 350°F (175°C) while the crust chills.
- Prepare the Filling: In another bowl, combine brown sugar, corn syrup, and vanilla. Stir in chopped pecans.
- Fill the Tartlets: Remove the crusts from the fridge and pour the filling evenly into each tartlet shell.
- Bake: Bake for 20-25 minutes or until the filling is set and the crust is golden brown. Let cool before serving.
Mini Key Lime Pies
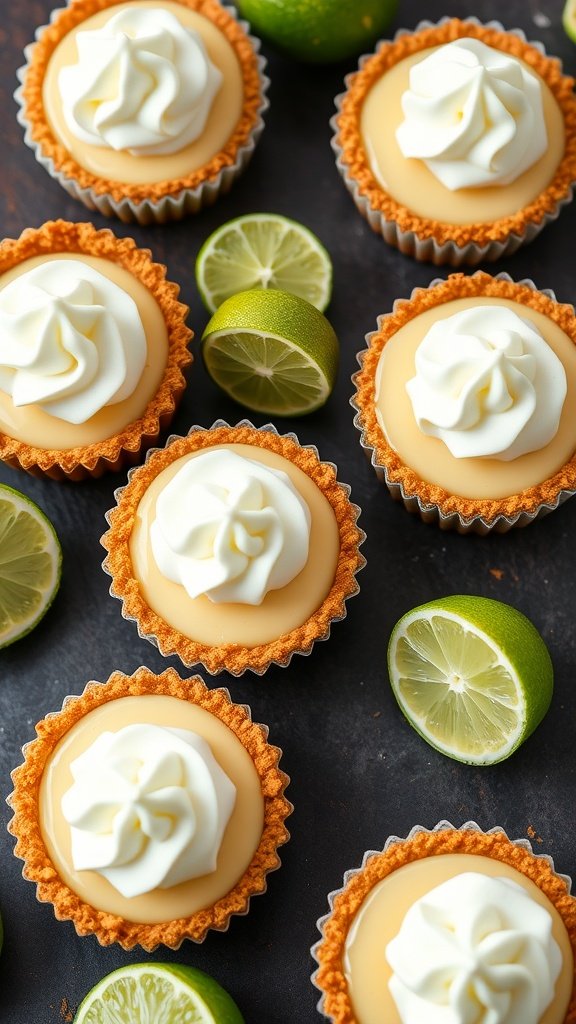
Mini Key Lime Pies are a delightful treat that brings a burst of citrus flavor with every bite. These little desserts are creamy, tangy, and perfectly sweet, making them an ideal choice for any gathering. They’re not just tasty; they’re also simple to prepare, which means you can whip them up in no time for your next party.
The buttery graham cracker crust pairs beautifully with the zesty key lime filling, topped off with a dollop of whipped cream that adds the perfect finishing touch. These mini desserts for parties are sure to impress your guests and leave them wanting more!
Ingredients
- 1 ½ cups graham cracker crumbs
- ½ cup granulated sugar
- ⅓ cup unsalted butter, melted
- 2 large egg yolks
- 1 can (14 ounces) sweetened condensed milk
- ½ cup fresh key lime juice
- 1 teaspoon lime zest
- Whipped cream for topping
Instructions
- Preheat the oven to 350°F (175°C).
- In a mixing bowl, combine graham cracker crumbs, sugar, and melted butter until well mixed. Press the mixture evenly into the bottoms of a muffin tin lined with cupcake liners.
- In another bowl, whisk together the egg yolks, sweetened condensed milk, key lime juice, and lime zest until smooth.
- Pour the filling into the crusts, filling each about ¾ full. Bake for 15-18 minutes until set.
- Let them cool before refrigerating for at least 2 hours. Once chilled, top with whipped cream before serving.
Chocolate Chip Brownie Bites
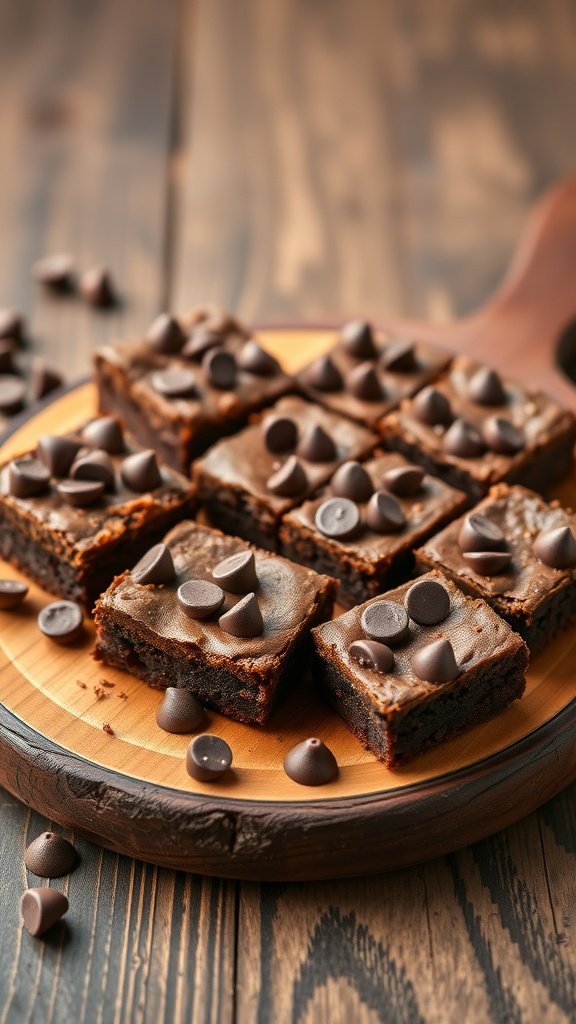
Chocolate chip brownie bites are a delightful treat that combines the fudgy richness of brownies with the added joy of chocolate chips. These mini desserts for parties are not only easy to make but also sure to satisfy any sweet tooth. With their gooey centers and a slight crunch on the edges, they offer a perfect balance of flavors and textures.
Making these brownie bites is a breeze, requiring just a few simple ingredients. They can be whipped up quickly, making them an ideal choice for last-minute gatherings or special occasions. Serve them warm or at room temperature, and watch them disappear!
Ingredients
- 1/2 cup unsalted butter
- 1 cup granulated sugar
- 2 large eggs
- 1 teaspoon vanilla extract
- 1/3 cup unsweetened cocoa powder
- 1/2 cup all-purpose flour
- 1/4 teaspoon salt
- 1/4 teaspoon baking powder
- 1 cup chocolate chips (semi-sweet)
Instructions
- Preheat the oven to 350°F (175°C) and grease a mini muffin tin.
- In a medium saucepan, melt the butter over low heat. Remove from heat and stir in the sugar, eggs, and vanilla.
- Mix in the cocoa powder, flour, salt, and baking powder until just combined. Be careful not to overmix.
- Fold in the chocolate chips.
- Pour the batter into the prepared mini muffin tin, filling each cup about 2/3 full.
- Bake for 10-12 minutes, or until a toothpick inserted comes out with a few moist crumbs.
- Allow to cool slightly before removing from the tin. Serve warm or at room temperature.
This post may contain affiliate links. Please see my disclosure policy for details.


