The Best Fluffy Pancakes recipe you will fall in love with. Full of tips and tricks to help you make the best pancakes.
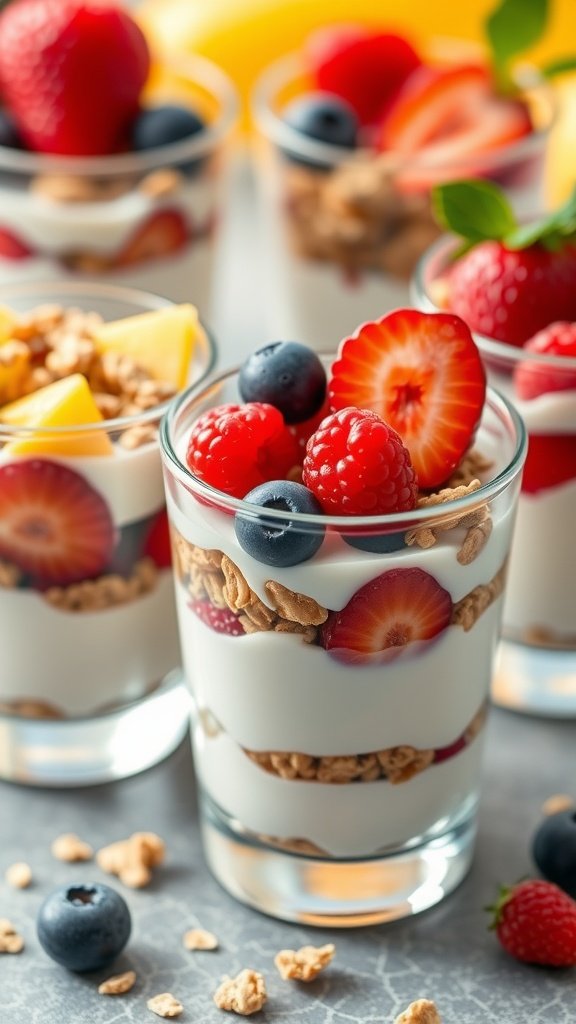
Mini desserts are a delightful way to enjoy your sweet cravings without overindulging. They come in all shapes and sizes, offering flavorful bites that satisfy your sweet tooth while making for a fun presentation at any gathering. Whether it’s tiny tarts, bite-sized cakes, or adorable cookie sandwiches, these petite treats are perfect for sharing or enjoying all on your own!
Mini Chocolate Lava Cakes
Contents
- Mini Chocolate Lava Cakes
- Bite-Sized Macarons
- Miniature Eclairs
- Chocolate Dipped Strawberries
- Mini Cheesecakes with Berry Compote
- Petite Fruit Tarts
- Mini Pavlovas with Whipped Cream
- Petite Pumpkin Spice Cakes
- Chocolate Mousse Cups
- Mini Key Lime Pies
- Chocolate Covered Mini Pretzels
- Mini Carrot Cakes
- Mini Banana Pudding Cups
- Petite Biscotti
- Mini S’mores Cups
- Fruit and Yogurt Parfaits
- Coconut Macaroons
- Mini Almond Joy Bites
- Pistachio Pudding Cups
- Mini Donuts with Glaze
- Mini Tiramisu Cups
- Chocolate Chip Cookie Shots
- Mini Cheesecake Pops
- Mini Red Velvet Cupcakes
- Petite Berry Crumbles
- Lavender Shortbread Cookies
- Mini Pecan Pies
- Decadent Mini Cheesecakes
- Mini Chocolate Chip Muffins
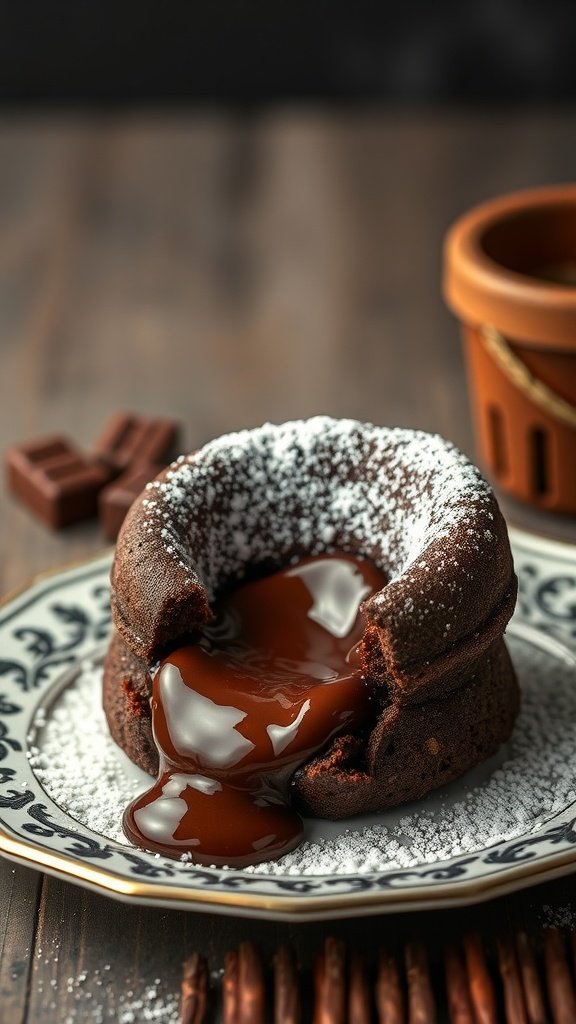
Mini chocolate lava cakes are a delightful treat that perfectly balance the richness of chocolate and the excitement of a gooey center. These little desserts offer a warm, molten chocolate experience that’s sure to please anyone with a sweet tooth. They’re surprisingly easy to prepare, making them a great choice for both casual dinners and special occasions.
The outside of the cake has a soft, cake-like texture, while the inside reveals a luscious, flowing chocolate core. This contrast is what makes them so special! You can whip these up in under an hour, and they’re sure to impress your guests. Serve them with a scoop of vanilla ice cream or a dollop of whipped cream for an extra touch.
Ingredients
- 1/2 cup unsalted butter
- 1 cup semi-sweet chocolate chips
- 1 cup powdered sugar
- 2 large eggs
- 2 large egg yolks
- 1 teaspoon vanilla extract
- 1/2 cup all-purpose flour
- Pinch of salt
Instructions
- Preheat the oven to 425°F (220°C). Grease four ramekins with butter and lightly dust with flour.
- In a microwave-safe bowl, melt the butter and chocolate chips together in 30-second intervals, stirring until smooth.
- Stir in the powdered sugar until combined. Add the eggs, yolks, and vanilla extract, mixing well.
- Fold in the flour and salt until just combined, being careful not to overmix.
- Pour the batter evenly into the prepared ramekins, filling them about 3/4 full.
- Bake for 12-14 minutes, or until the edges are firm but the center is still soft. Let them cool for 1 minute before inverting onto plates.
- Serve immediately, and enjoy the warm, gooey chocolate center!
Bite-Sized Macarons

Bite-sized macarons are delightful little treats that pack a lot of flavor into a small package. With their light, chewy texture and crisp shells, these mini desserts are a feast for the senses. Whether you choose classic flavors like vanilla and chocolate or get creative with fruity or nutty variations, there’s a macaron for everyone!
Making macarons might seem a bit intimidating, but with a little practice, you can master this elegant dessert. They are perfect for any occasion, from parties to casual snacking. Get ready to impress your friends and family with these colorful, tasty bites!
Ingredients
- 1 cup almond flour
- 1 3/4 cup powdered sugar
- 3 large egg whites
- 1/4 cup granulated sugar
- 1/2 teaspoon vanilla extract
- Food coloring (optional)
- 1 cup buttercream or ganache for filling
Instructions
- Prepare the Dry Ingredients: Sift together almond flour and powdered sugar into a bowl, ensuring there are no lumps.
- Whip the Egg Whites: In a clean bowl, beat the egg whites until they form soft peaks. Gradually add granulated sugar and continue to whip until stiff peaks form. Add vanilla extract and food coloring if desired.
- Combine Mixtures: Gently fold the dry mixture into the egg whites until fully incorporated. The batter should flow like lava and have a glossy finish.
- Pipe the Macarons: Transfer the batter to a piping bag and pipe small circles onto parchment-lined baking sheets. Let them sit for about 30 minutes to form a skin.
- Bake the Macarons: Preheat the oven to 300°F (150°C). Bake for 15-20 minutes, or until the macarons lift easily from the parchment paper without sticking.
- Cool and Fill: Allow the macarons to cool completely before pairing them up and filling with buttercream or ganache. Sandwich them together and enjoy your homemade mini desserts!
Miniature Eclairs

Miniature eclairs are delightful, bite-sized treats that pack a flavor punch in every bite. Made from choux pastry and filled with creamy custard, these mini desserts are a crowd-pleaser at any gathering. The combination of a crunchy exterior with a soft, sweet filling, and topped with rich chocolate ganache creates a balance that is simply irresistible.
While making eclairs may seem intimidating, they are actually quite simple to prepare. With a little patience and practice, you can master this classic French dessert. Perfect for parties or as a sweet indulgence at home, these mini eclairs will definitely impress anyone lucky enough to try them.
Ingredients
- 1 cup water
- 1/2 cup unsalted butter
- 1 cup all-purpose flour
- 1/4 teaspoon salt
- 4 large eggs
- 1 cup pastry cream (store-bought or homemade)
- 1 cup dark chocolate, chopped
- 1/2 cup heavy cream
Instructions
- Make the Choux Pastry: In a saucepan, bring the water and butter to a boil. Stir in flour and salt until the mixture forms a ball. Remove from heat and let it cool slightly. Add eggs one at a time, mixing well after each addition until smooth.
- Pipe the Eclairs: Preheat your oven to 400°F (200°C). Transfer the dough to a piping bag fitted with a large round tip. Pipe small logs (about 2 inches long) onto a baking sheet lined with parchment paper.
- Bake the Eclairs: Bake for 20-25 minutes until golden brown. Allow them to cool completely.
- Prepare the Pastry Cream: If not using store-bought, prepare pastry cream according to your favorite recipe and let it cool.
- Fill the Eclairs: Use a pastry bag to pipe the pastry cream into the cooled eclairs.
- Make the Ganache: Heat the heavy cream until just simmering, then pour over the chopped chocolate. Stir until smooth and glossy.
- Dip the Eclairs: Dip the tops of the filled eclairs into the ganache and let them set on a wire rack.
Chocolate Dipped Strawberries

Chocolate dipped strawberries are a delightful treat that combines the sweetness of fresh strawberries with the rich taste of chocolate. They’re perfect for any occasion, whether it’s a casual get-together or a romantic dinner. Plus, they are incredibly simple to make, requiring just a few ingredients and minimal time.
The contrast of the juicy strawberry and the smooth chocolate creates a taste sensation that’s hard to beat. These mini desserts can be customized with different types of chocolate or toppings, making them versatile for everyone’s palate. Whether enjoyed as a snack or served at a party, chocolate dipped strawberries are sure to impress!
Ingredients
- 1 pound fresh strawberries, washed and dried
- 8 ounces semi-sweet chocolate or dark chocolate, chopped
- 2 tablespoons coconut oil (optional, for smooth melting)
- Sprinkles or crushed nuts (optional, for garnish)
Instructions
- Prepare the Strawberries: Make sure the strawberries are completely dry after washing. This will help the chocolate stick better.
- Melt the Chocolate: In a microwave-safe bowl, combine the chopped chocolate and coconut oil. Microwave in 30-second intervals, stirring in between, until melted and smooth.
- Dip the Strawberries: Hold each strawberry by the stem and dip it into the melted chocolate, allowing any excess to drip off.
- Add Toppings: If desired, sprinkle on some crushed nuts or sprinkles before the chocolate sets.
- Cool and Serve: Place the dipped strawberries on a baking sheet lined with parchment paper. Let them cool at room temperature or refrigerate until the chocolate hardens.
Mini Cheesecakes with Berry Compote
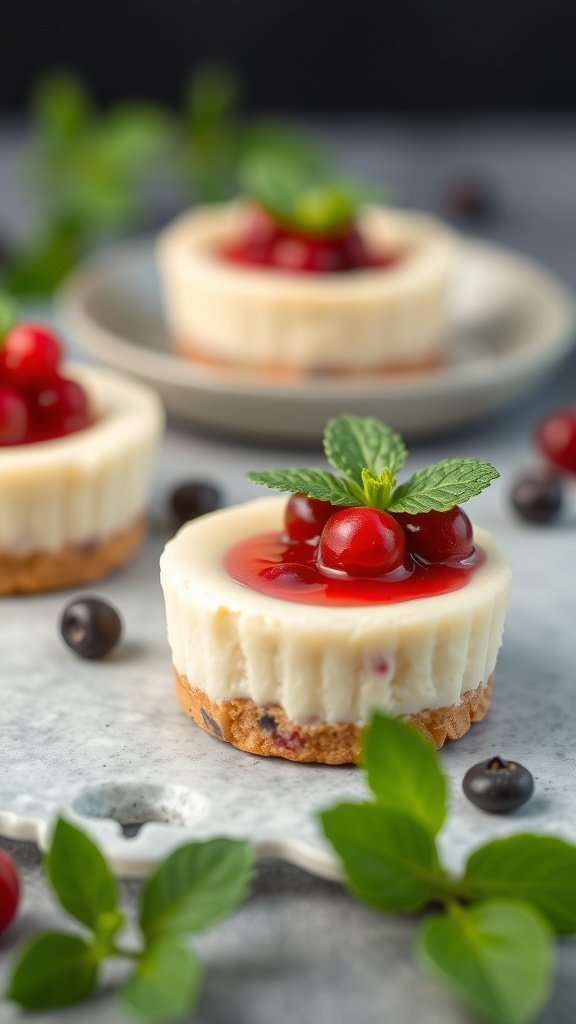
Mini cheesecakes are a delightful treat that packs all the creamy goodness of traditional cheesecake into a perfectly portioned bite. These little desserts are not just pleasing to the eye but also offer a fantastic balance of sweetness and tartness thanks to the berry compote. They are simple to make and are sure to impress at any gathering.
The buttery crust combined with the smooth cheesecake filling creates a lovely texture, while the fresh berry topping adds a pop of color and flavor. Whether you’re hosting a party or just indulging yourself, mini cheesecakes are a lovely way to enjoy a sweet moment.
Ingredients
- 1 cup crushed graham crackers
- 1/4 cup unsalted butter, melted
- 2 cups cream cheese, softened
- 1/2 cup granulated sugar
- 2 large eggs
- 1 teaspoon vanilla extract
- 1 cup mixed berries (strawberries, blueberries, raspberries)
- 1/4 cup sugar (for compote)
- 1 tablespoon lemon juice
Instructions
- Preheat the Oven: Preheat your oven to 325°F (160°C).
- Prepare the Crust: In a bowl, mix crushed graham crackers with melted butter until well combined. Press the mixture evenly into the bottom of mini cheesecake cups.
- Make the Cheesecake Filling: In a large mixing bowl, beat the softened cream cheese and granulated sugar until smooth. Add eggs one at a time, mixing well after each addition, then stir in vanilla extract.
- Fill the Cups: Spoon the cheesecake filling over the crust in each mini cup, filling them about three-quarters full.
- Bake: Bake for about 20-25 minutes or until the edges are set but the centers are slightly jiggly. Remove from the oven and let cool.
- Prepare the Berry Compote: In a small saucepan, combine mixed berries, sugar, and lemon juice. Cook over medium heat until the berries release their juices and the mixture thickens slightly, about 5-7 minutes.
- Assemble: Once cooled, top each mini cheesecake with a spoonful of the berry compote. Chill in the refrigerator for at least 2 hours before serving.
Petite Fruit Tarts
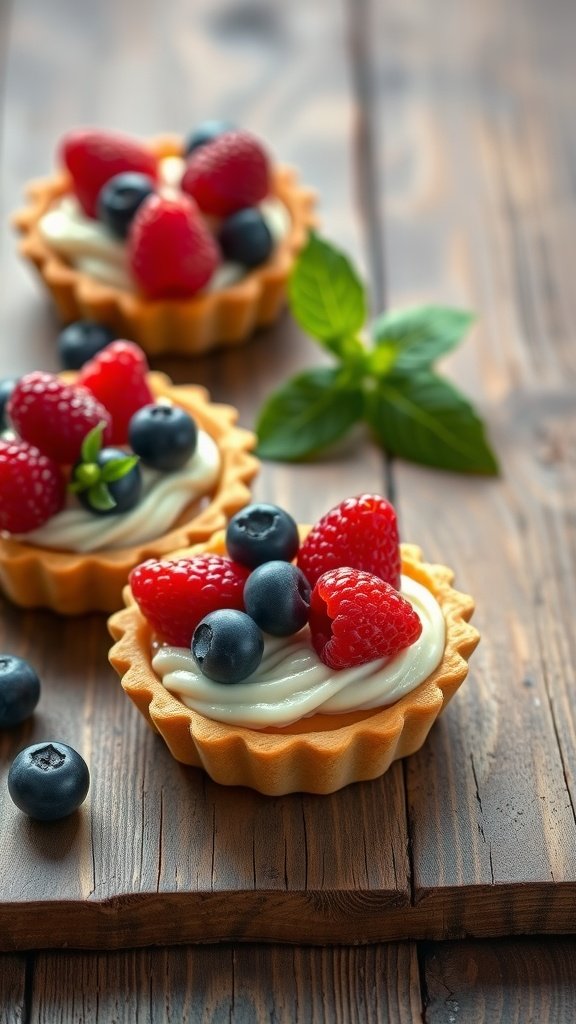
Petite fruit tarts are delightful mini desserts that combine a buttery crust with a creamy filling and fresh fruit. These bite-sized treats offer a perfect balance of sweetness and tanginess, making them a hit for any occasion. They are surprisingly simple to make, allowing even novice bakers to impress their friends and family.
The crispy tart shell, luscious filling, and vibrant fruit toppings create a visual and flavorful treat that’s hard to resist. Whether you’re hosting a party or just craving something sweet, these mini desserts are an enjoyable way to satisfy your sweet tooth!
Ingredients
- 1 cup all-purpose flour
- 1/4 cup powdered sugar
- 1/2 cup unsalted butter, softened
- 1 large egg yolk
- 1/2 teaspoon vanilla extract
- 1 cup cream cheese, softened
- 1/4 cup granulated sugar
- 2 tablespoons lemon juice
- 1 cup mixed fresh berries (raspberries, blueberries, and strawberries)
- Mint leaves for garnish (optional)
Instructions
- Make the Tart Shell: Preheat the oven to 350°F (175°C). In a bowl, mix flour and powdered sugar. Add softened butter and egg yolk, then vanilla extract. Blend until a dough forms. Press the dough into mini tart pans.
- Bake the Shells: Place the tart pans on a baking sheet and bake for 15-20 minutes, or until golden brown. Allow to cool completely.
- Prepare the Filling: In a mixing bowl, beat the cream cheese until smooth. Gradually add granulated sugar and lemon juice, mixing until well combined.
- Assemble the Tarts: Spoon the cream cheese mixture into the cooled tart shells. Top with mixed fresh berries, arranging them as desired.
- Garnish and Serve: If desired, add mint leaves for a pop of color. Chill in the refrigerator for about 30 minutes before serving.
Mini Pavlovas with Whipped Cream
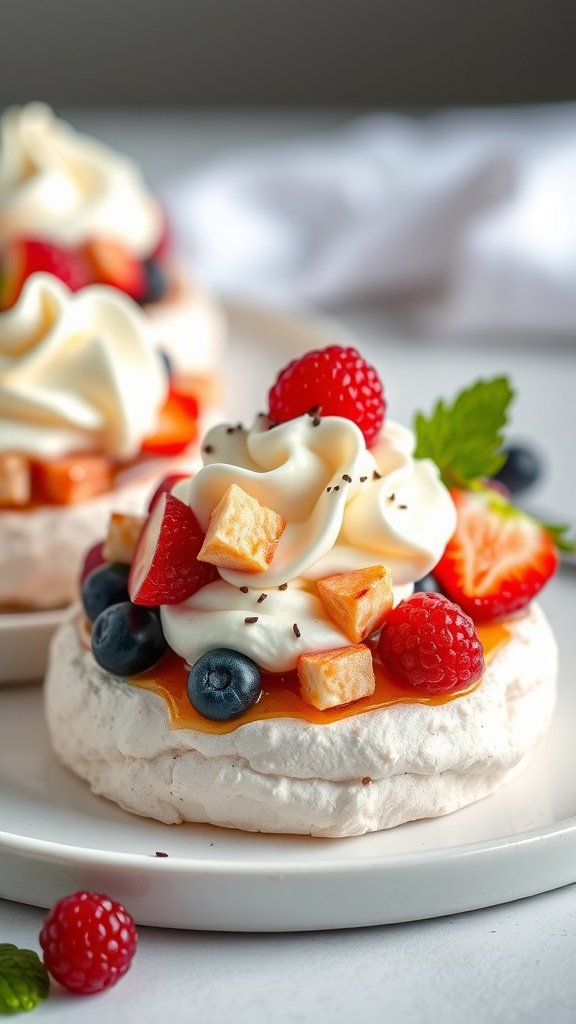
Mini Pavlovas are delightful little desserts that burst with flavor and texture. These airy meringue shells have a crisp outer layer and a soft, marshmallow-like center. Topped with luscious whipped cream and fresh fruit, they offer a perfect balance of sweetness and tartness that makes them a hit at any gathering.
Making these mini desserts is quite straightforward, and you can customize them with your favorite fruits. They are not only visually appealing but also a treat for the taste buds. Whether for a party or just a sweet indulgence at home, Mini Pavlovas are sure to impress!
Ingredients
- 4 large egg whites
- 1 cup granulated sugar
- 1 teaspoon vanilla extract
- 1 teaspoon white vinegar
- 1 cup heavy whipping cream
- 2 tablespoons powdered sugar
- Fresh berries (strawberries, blueberries, raspberries)
- Fruit preserves (apricot or passion fruit, optional)
Instructions
- Preheat your oven to 225°F (110°C) and line a baking sheet with parchment paper.
- In a clean, dry bowl, beat the egg whites on medium speed until soft peaks form. Gradually add the granulated sugar, continuing to beat until stiff peaks form and the mixture is glossy.
- Mix in the vanilla extract and white vinegar until combined. Spoon or pipe the meringue into small, round nests on the prepared baking sheet.
- Bake for about 1 hour, then turn off the oven and let the meringues cool completely inside.
- Once cooled, whip the heavy cream with powdered sugar until soft peaks form. Spoon or pipe the whipped cream onto each meringue.
- Top with fresh berries and drizzle some fruit preserves if desired. Serve immediately and enjoy your delicious Mini Pavlovas!
Petite Pumpkin Spice Cakes

These petite pumpkin spice cakes are a delightful treat that perfectly encapsulate the flavors of fall. With a moist texture and rich pumpkin flavor, they are subtly spiced with cinnamon and nutmeg, making each bite comforting and satisfying. They are simple to make, making them a great choice for both seasoned bakers and those just starting out in the kitchen.
Ideal for any gathering or cozy afternoon snack, these mini desserts are sure to impress. Top them with a swirl of cream cheese frosting for a sweet finish that balances out the spices beautifully. Your friends and family will love these bite-sized delights!
Ingredients
- 1 cup all-purpose flour
- 1/2 teaspoon baking powder
- 1/2 teaspoon baking soda
- 1 teaspoon ground cinnamon
- 1/2 teaspoon ground nutmeg
- 1/4 teaspoon salt
- 1/2 cup granulated sugar
- 1/4 cup brown sugar, packed
- 1/2 cup canned pumpkin puree
- 1/4 cup vegetable oil
- 2 large eggs
- 1 teaspoon vanilla extract
- 1/2 cup cream cheese, softened
- 1/2 cup powdered sugar
- 1 tablespoon milk
Instructions
- Preheat the oven to 350°F (175°C) and line a muffin tin with cupcake liners.
- In a medium bowl, whisk together flour, baking powder, baking soda, cinnamon, nutmeg, and salt.
- In a large bowl, mix granulated sugar, brown sugar, pumpkin puree, vegetable oil, eggs, and vanilla until well combined.
- Gradually fold the dry ingredients into the wet mixture until just combined.
- Evenly distribute the batter into the prepared muffin tin, filling each liner about two-thirds full.
- Bake for 15-18 minutes or until a toothpick inserted into the center comes out clean. Allow to cool completely.
- In a separate bowl, beat together the cream cheese, powdered sugar, and milk until smooth. Frost the cooled cakes as desired.
Chocolate Mousse Cups
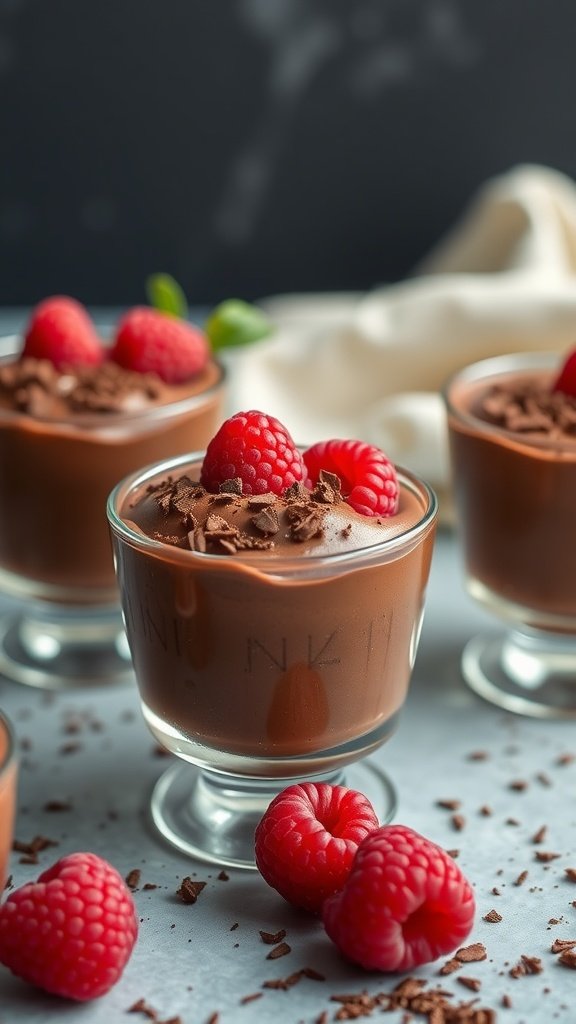
Chocolate mousse cups are a delightful treat that blend rich chocolate flavor with a light, airy texture. These mini desserts are perfect for satisfying your sweet cravings without overwhelming your palate. They’re simple enough to whip up and offer a wonderful balance of creamy and fluffy, making them a favorite among chocolate lovers.
The addition of fresh raspberries adds a burst of fruity freshness, enhancing the overall taste experience. Whether you’re hosting a dinner party or just want a little indulgence at home, these chocolate mousse cups are sure to impress without requiring extensive time in the kitchen.
Ingredients
- 1 cup heavy whipping cream
- 1/2 cup semi-sweet chocolate chips
- 2 tablespoons sugar
- 1 teaspoon vanilla extract
- Fresh raspberries for garnish
- Chocolate shavings for garnish
Instructions
- Melt the chocolate chips in a microwave-safe bowl, heating in 30-second intervals, stirring until smooth. Let it cool slightly.
- In a separate bowl, whip the heavy cream, sugar, and vanilla extract until soft peaks form.
- Gently fold the melted chocolate into the whipped cream until fully combined, being careful not to deflate the mixture.
- Transfer the mousse into small cups or glasses, and chill in the refrigerator for at least 2 hours to set.
- Before serving, top with fresh raspberries and chocolate shavings for a beautiful presentation.
Mini Key Lime Pies
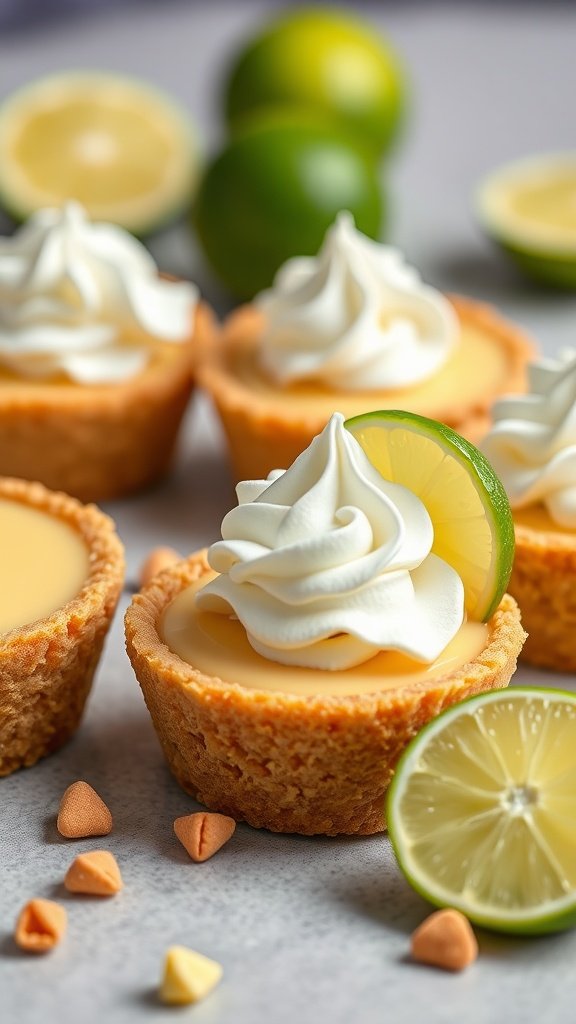
Mini Key Lime Pies are delightful little treats that pack a punch of zesty lime flavor. These mini desserts are creamy, tangy, and just sweet enough to satisfy your cravings without overwhelming your taste buds. Perfect for warm weather or any occasion, they’re simple to whip up and will impress your friends and family.
The combination of a buttery graham cracker crust with a smooth and tangy filling makes each bite a refreshing experience. Topped with a dollop of whipped cream and a slice of lime, these pies are as cute as they are delicious!
Ingredients
- 1 ½ cups graham cracker crumbs
- ⅓ cup granulated sugar
- ½ cup unsalted butter, melted
- 1 cup sweetened condensed milk
- ½ cup key lime juice
- 3 large egg yolks
- 1 teaspoon lime zest
- Whipped cream for topping
- Lime slices for garnish
Instructions
- Preheat the oven to 350°F (175°C).
- In a mixing bowl, combine graham cracker crumbs, sugar, and melted butter. Mix until well combined.
- Press the crumb mixture into the bottoms and up the sides of a mini muffin tin to form crusts.
- Bake the crusts for about 8-10 minutes, or until golden brown. Remove and let cool.
- In another bowl, whisk together sweetened condensed milk, key lime juice, egg yolks, and lime zest until smooth.
- Pour the lime mixture into the cooled crusts, filling each to the top.
- Bake for an additional 15 minutes, then cool to room temperature before chilling in the refrigerator for at least 2 hours.
- Before serving, top each mini pie with whipped cream and a slice of lime.
Chocolate Covered Mini Pretzels
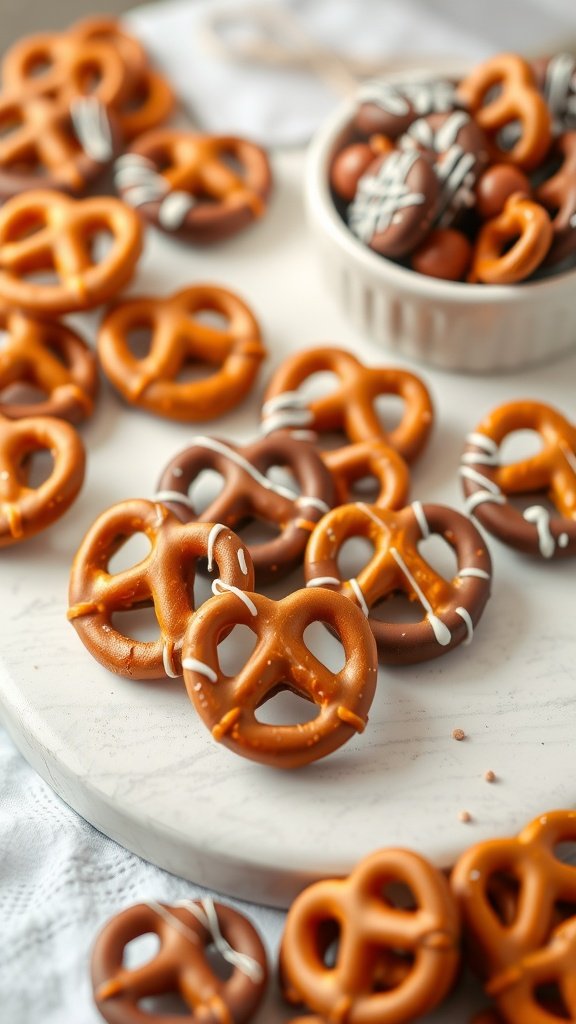
Chocolate covered mini pretzels are a delightful treat that perfectly balance sweet and salty flavors. These bite-sized snacks are not only delicious but also incredibly easy to make, making them a fantastic choice for gatherings or as a quick dessert fix.
The crunchy pretzels coated in smooth chocolate create a satisfying crunch with each bite. Whether you use milk, dark, or white chocolate, the flavors meld beautifully, offering a tasty indulgence. They can also be customized with toppings like sprinkles or crushed nuts for added flair. Here’s how to whip up these delightful mini desserts!
Ingredients
- 2 cups mini pretzels
- 1 cup chocolate chips (milk, dark, or white)
- 1 tablespoon vegetable oil
- Sprinkles or crushed nuts (optional)
Instructions
- Melt the Chocolate: In a microwave-safe bowl, combine chocolate chips and vegetable oil. Microwave in 30-second intervals, stirring in between, until smooth and fully melted.
- Dip the Pretzels: Dip each mini pretzel into the melted chocolate, ensuring it’s fully coated. Allow any excess chocolate to drip off.
- Set on Baking Sheet: Place the coated pretzels on a parchment-lined baking sheet. If desired, sprinkle with toppings while the chocolate is still wet.
- Cool and Hardening: Refrigerate for about 15-20 minutes, or until the chocolate has completely set.
- Serve: Once the chocolate is firm, enjoy your chocolate covered mini pretzels as a sweet treat!
Mini Carrot Cakes

These mini carrot cakes are a delightful twist on a classic treat, perfect for anyone looking to enjoy a little sweetness without going overboard. Bursting with the warm flavors of cinnamon and nutmeg, each bite is moist and flavorful, complemented by a rich cream cheese frosting on top.
Not only are they easy to make, but they also offer a fun presentation that’s sure to please guests at any gathering. With simple ingredients and a straightforward process, these mini desserts are a great way to satisfy your sweet tooth without the guilt of a larger cake.
Ingredients
- 1 cup all-purpose flour
- 1/2 cup granulated sugar
- 1 teaspoon baking powder
- 1/2 teaspoon baking soda
- 1/2 teaspoon ground cinnamon
- 1/4 teaspoon ground nutmeg
- 1/4 teaspoon salt
- 3/4 cup finely grated carrots
- 1/2 cup vegetable oil
- 2 large eggs
- 1 teaspoon vanilla extract
- 1/4 cup crushed pineapple, drained
- 1/2 cup chopped walnuts (optional)
- 1 cup cream cheese, softened
- 1/2 cup powdered sugar
- 1 teaspoon vanilla extract (for frosting)
Instructions
- Preheat the oven to 350°F (175°C) and line a muffin tin with cupcake liners.
- In a large bowl, combine flour, sugar, baking powder, baking soda, cinnamon, nutmeg, and salt.
- Add grated carrots, vegetable oil, eggs, vanilla extract, and crushed pineapple to the dry ingredients. Mix until just combined. If using, fold in chopped walnuts.
- Pour the batter into the prepared muffin tin, filling each liner about 2/3 full.
- Bake for 18-20 minutes or until a toothpick inserted in the center comes out clean. Allow to cool completely.
- While the cakes are cooling, prepare the frosting by beating the cream cheese, powdered sugar, and vanilla extract until smooth and creamy.
- Once the cakes are cool, frost each mini carrot cake and enjoy!
Mini Banana Pudding Cups
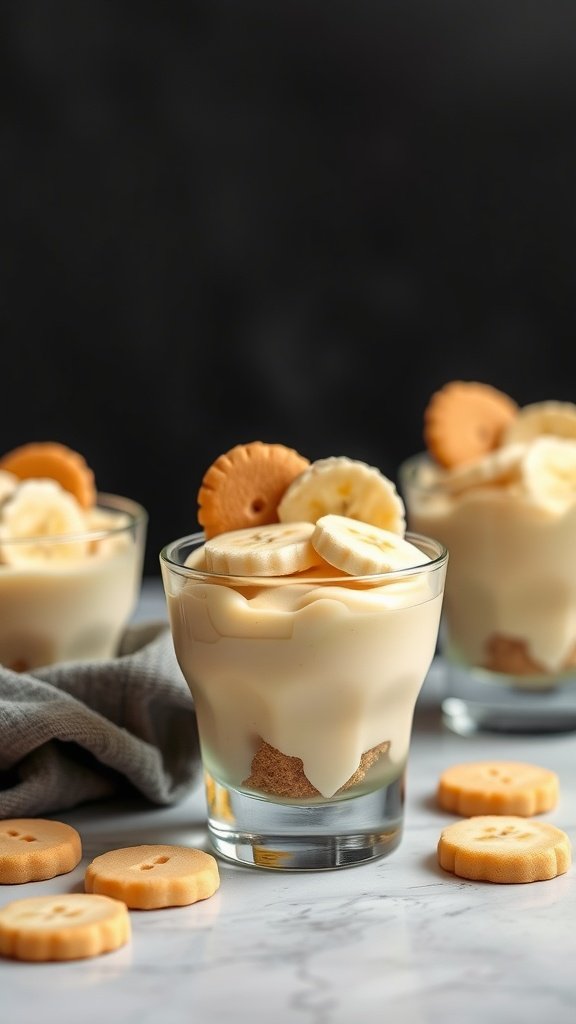
Mini Banana Pudding Cups are a delightful treat that perfectly balances the creamy goodness of pudding with the sweetness of ripe bananas and the crunch of cookies. These little desserts are not just cute; they’re also easy to make, making them a great choice for gatherings or a simple sweet fix at home.
The layers of luscious banana pudding, fresh banana slices, and cookie crumbles create a harmonious combination of textures and flavors. You can whip these up in no time, and they’re sure to bring smiles to everyone’s faces!
Ingredients
- 2 cups whole milk
- 1/2 cup granulated sugar
- 1/3 cup cornstarch
- 1/4 teaspoon salt
- 2 teaspoons vanilla extract
- 1 tablespoon unsalted butter
- 1 cup heavy whipping cream
- 2 ripe bananas, sliced
- 1 cup vanilla wafer cookies, crushed
Instructions
- Prepare the Pudding: In a saucepan over medium heat, whisk together milk, sugar, cornstarch, and salt. Cook until the mixture thickens, stirring constantly. Once thickened, remove from heat and stir in vanilla extract and butter. Let it cool.
- Whip the Cream: In a separate bowl, whip the heavy cream until soft peaks form. Gently fold the whipped cream into the cooled pudding mixture until well combined.
- Assemble the Cups: In small cups or glasses, layer crushed vanilla wafers, a layer of banana slices, and then the banana pudding. Repeat the layers until the cups are filled, finishing with a layer of pudding on top.
- Chill: Refrigerate the assembled cups for at least 2 hours to allow the flavors to meld.
- Serve: Top with extra banana slices or cookie crumbles before serving for a fun touch!
Petite Biscotti
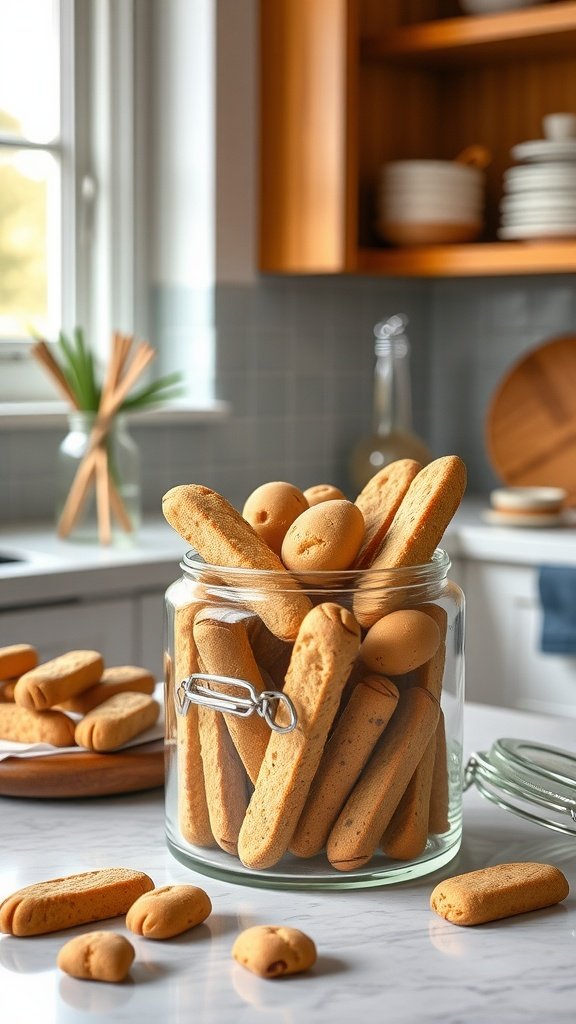
Petite biscotti are delightful little treats that pack a punch of flavor in every bite. With their crunchy texture and subtle sweetness, they make for a perfect companion to your coffee or tea. Not only are they simple to make, but they also offer a rewarding baking experience that anyone can enjoy.
The versatility of biscotti allows for endless flavor combinations, whether you prefer classic almond, zesty orange, or even chocolate chip. These mini desserts are easily customizable, making them a fun baking project for all skill levels.
Ingredients
- 2 cups all-purpose flour
- 1 cup granulated sugar
- 1/2 cup unsalted butter, melted
- 2 large eggs
- 1 teaspoon vanilla extract
- 1 teaspoon baking powder
- 1/2 teaspoon salt
- 1/2 cup chopped nuts (almonds or hazelnuts)
- 1/2 cup chocolate chips (optional)
Instructions
- Preheat the oven to 350°F (175°C) and line a baking sheet with parchment paper.
- In a large bowl, mix together the flour, sugar, baking powder, and salt.
- Add the melted butter, eggs, and vanilla. Stir until a dough forms.
- Fold in the nuts and chocolate chips, if using.
- Shape the dough into two logs, about 1 inch thick, and place them on the prepared baking sheet.
- Bake for 25-30 minutes or until golden brown. Remove from the oven and let cool for 10 minutes.
- Slice the logs into 1/2-inch thick pieces and return them to the oven for an additional 10-15 minutes until crisp.
- Let them cool completely before serving. Enjoy your homemade petite biscotti!
Mini S’mores Cups
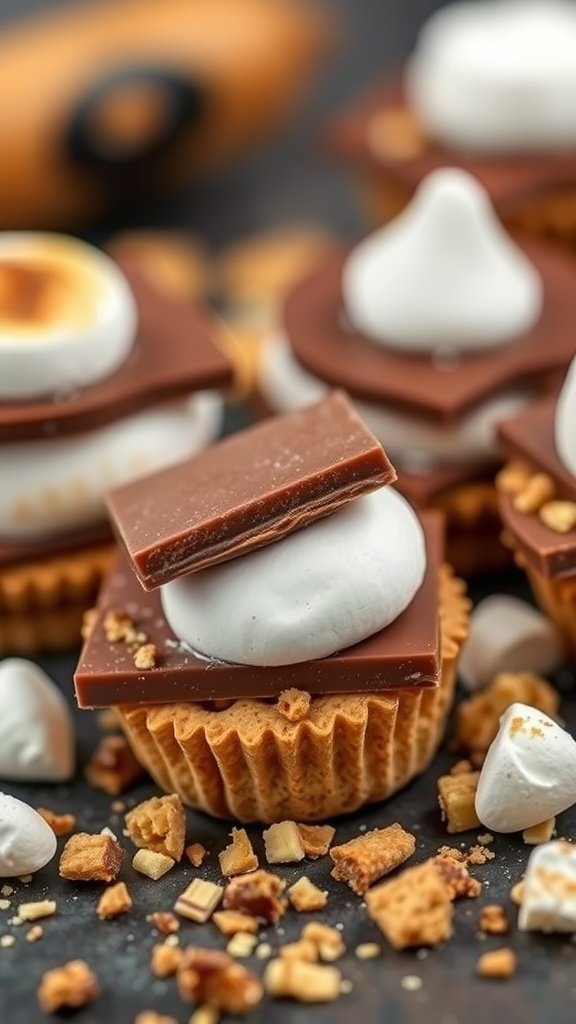
Mini S’mores Cups are a delightful twist on the classic campfire treat, packed into a tiny, easy-to-eat dessert. These little cups combine the sweet and crunchy flavors of graham crackers, rich chocolate, and fluffy marshmallows, making them a favorite for both kids and adults alike. They are simple to prepare and perfect for gatherings or a cozy night in.
Imagine biting into a mini dessert that offers all the warm, nostalgic flavors of traditional s’mores but without the need for a fire. These cups are quick to assemble and can be enjoyed anytime. Whether you’re entertaining guests or just satisfying a sweet tooth, these Mini S’mores Cups are sure to please!
Ingredients
- 1 cup graham cracker crumbs
- 1/4 cup granulated sugar
- 1/4 cup unsalted butter, melted
- 1 cup chocolate chips
- 1 cup mini marshmallows
- 1/2 cup chopped nuts (optional)
Instructions
- Preheat your oven to 350°F (175°C).
- In a bowl, mix graham cracker crumbs, sugar, and melted butter until combined. Press the mixture into the bottom of mini muffin tins to form a crust.
- Bake the crusts for about 5-7 minutes until lightly golden.
- Remove from the oven and immediately place a few chocolate chips on each crust, allowing them to melt slightly.
- Top each cup with mini marshmallows, and return to the oven for another 3-5 minutes until the marshmallows are toasted.
- Allow to cool slightly, then remove from the tins and sprinkle with chopped nuts if desired. Enjoy your Mini S’mores Cups!
Fruit and Yogurt Parfaits

Fruit and yogurt parfaits are a delightful way to enjoy a mini dessert that combines creamy yogurt, crunchy granola, and fresh fruits. They offer a refreshing taste, perfect for any time of day, whether as a light dessert or a tasty breakfast treat. The sweetness of the fruit and the tanginess of the yogurt create a balanced flavor that’s hard to resist.
Making these parfaits is simple and requires no baking, making them an ideal choice for a quick and easy dessert. You can customize them with your favorite fruits and toppings, allowing for endless variations. So, grab some clear cups and start layering!
Ingredients
- 2 cups yogurt (plain or flavored)
- 1 cup granola
- 2 cups mixed fresh fruits (such as berries, bananas, and diced peaches)
- Honey or maple syrup (optional)
- Mint leaves for garnish (optional)
Instructions
- Prepare the Ingredients: Wash and slice the fresh fruits as needed. Choose a mix of your favorites for a colorful presentation.
- Layer the Parfaits: In clear cups or glasses, start by adding a layer of yogurt at the bottom. Follow with a layer of granola and then a layer of fresh fruit.
- Repeat the Layers: Continue layering until the cups are filled, finishing with a top layer of fruit. Drizzle honey or maple syrup on top if desired.
- Garnish: Add a mint leaf on top for a touch of freshness and color.
- Serve: Enjoy immediately or refrigerate for a short time before serving to let the flavors meld.
Coconut Macaroons
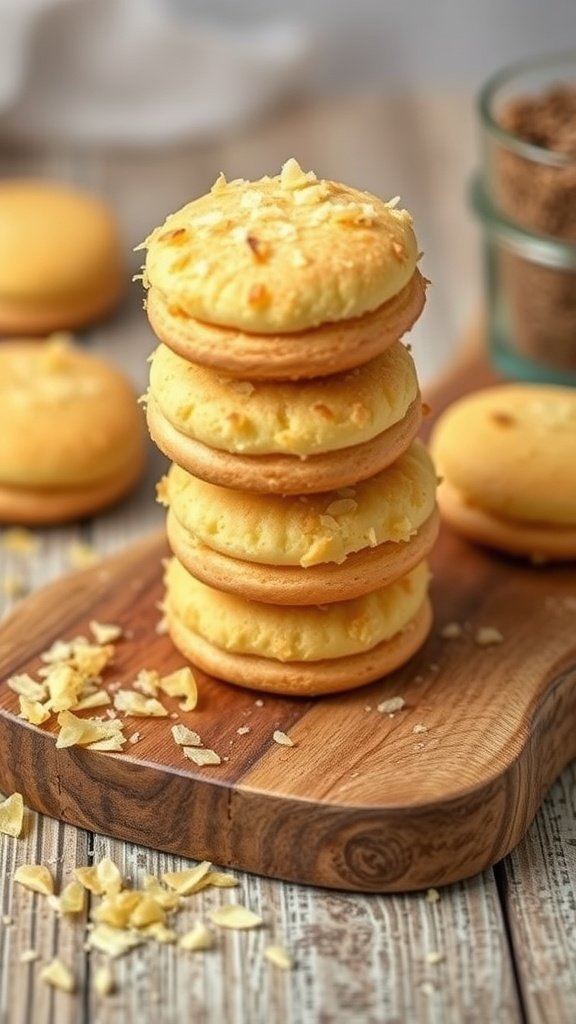
Coconut macaroons are delightful little treats that bring a tropical twist to mini desserts. With their chewy texture and sweet coconut flavor, they’re sure to satisfy any sweet tooth. Not only are they delicious, but they are also quite simple to make, making them a perfect choice for both novice and experienced bakers.
The coconut flavor shines through with each bite, creating a comforting and familiar taste. Whether you enjoy them as a quick snack or serve them at gatherings, these macaroons are always a hit. Plus, they require minimal ingredients and can be whipped up in no time!
Ingredients
- 2 2/3 cups shredded sweetened coconut
- 2/3 cup sweetened condensed milk
- 1 teaspoon vanilla extract
- 2 large egg whites
- 1/4 teaspoon salt
Instructions
- Preheat the Oven: Start by preheating your oven to 325°F (160°C) and lining a baking sheet with parchment paper.
- Mix Ingredients: In a mixing bowl, combine the shredded coconut, sweetened condensed milk, and vanilla extract. Stir until everything is well mixed.
- Whip Egg Whites: In a separate bowl, beat the egg whites and salt until soft peaks form. Gently fold the egg whites into the coconut mixture, being careful not to deflate them.
- Shape the Macaroons: Using a spoon or a small cookie scoop, drop rounded tablespoons of the mixture onto the prepared baking sheet, spacing them about an inch apart.
- Bake: Bake for about 20-25 minutes or until the tops are lightly golden brown. Allow them to cool on the baking sheet for a few minutes before transferring to a wire rack to cool completely.
Mini Almond Joy Bites
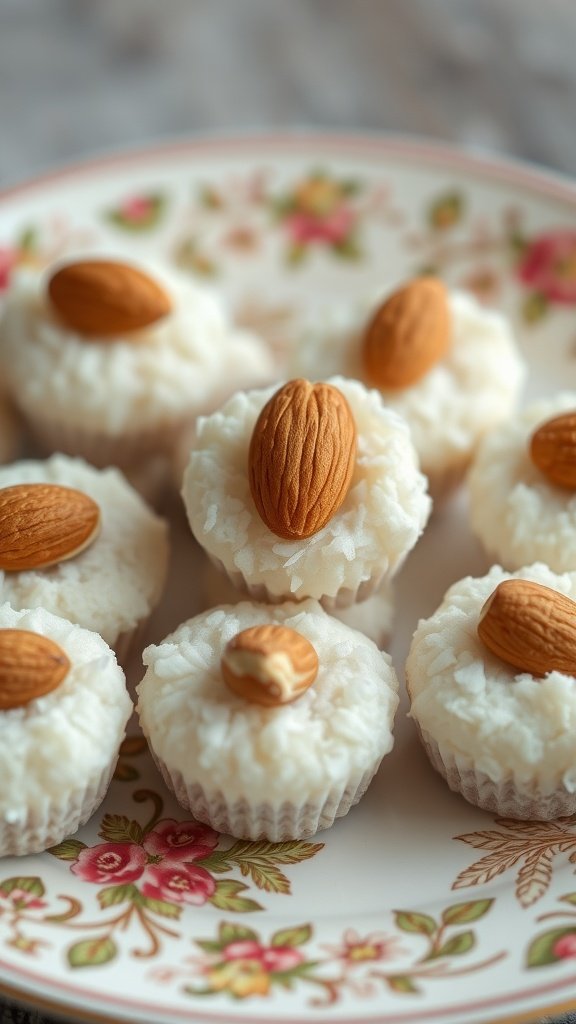
Mini Almond Joy Bites are delightful little treats that combine the rich flavors of chocolate, coconut, and almond. These no-bake mini desserts are easy to whip up, making them a perfect choice for last-minute gatherings or just a sweet snack at home. You’ll love the chewy texture of the coconut paired with the crunch of almonds on top.
This recipe is straightforward and doesn’t require any special baking skills, so anyone can enjoy making their own batch. Just mix, mold, and enjoy these sweet bites that are sure to satisfy your cravings!
Ingredients
- 1 cup shredded coconut
- 1/2 cup sweetened condensed milk
- 1 teaspoon vanilla extract
- 1 cup chocolate chips
- 12 whole almonds
Instructions
- Combine coconut, sweetened condensed milk, and vanilla extract in a bowl. Mix until well combined.
- Use your hands to form small bite-sized balls from the mixture and place them on a parchment-lined tray.
- Chill the coconut balls in the fridge for about 30 minutes to firm up.
- Melt the chocolate chips in a microwave-safe bowl, stirring every 30 seconds until smooth.
- Dip each chilled coconut ball into the melted chocolate, ensuring they are fully coated, and place them back on the tray.
- Top each chocolate-covered bite with a whole almond while the chocolate is still wet.
- Refrigerate the bites for another 15-20 minutes until the chocolate sets. Enjoy your mini desserts!
Pistachio Pudding Cups
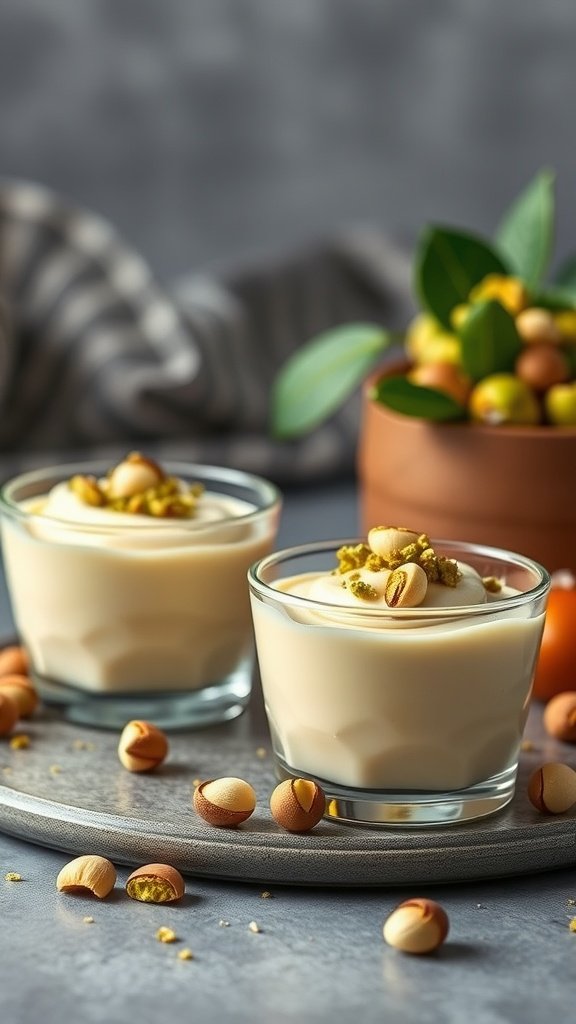
Pistachio pudding cups are a delightful treat that perfectly balance creamy texture and nutty flavor. This simple recipe allows you to whip up individual servings, making them a great option for mini desserts that leave a lasting impression.
The rich, subtly sweet taste of pistachios shines through in every spoonful, and the presentation in small cups makes them ideal for gatherings or a cozy night in. Plus, they’re super easy to prepare, so you won’t have to spend hours in the kitchen!
Ingredients
- 1 cup whole milk
- 1 cup heavy cream
- 1/2 cup granulated sugar
- 1/4 cup instant pistachio pudding mix
- 1 teaspoon vanilla extract
- 1/2 cup crushed pistachios for topping
Instructions
- In a medium bowl, whisk together the milk, heavy cream, sugar, and instant pistachio pudding mix until well combined.
- Continue whisking for about 2 minutes, or until the mixture thickens to a pudding-like consistency.
- Stir in the vanilla extract for added flavor.
- Divide the pudding mixture evenly into small cups or bowls, and refrigerate for at least 2 hours to set.
- Before serving, top each cup with crushed pistachios for a crunchy finish.
Mini Donuts with Glaze

Mini donuts are delightful little treats that bring a smile to any occasion. With their soft and fluffy texture, these bite-sized desserts are perfect for satisfying your sweet tooth. The glaze adds a burst of sweetness and can be customized with various colors and toppings, making them visually appealing and fun to eat.
Making mini donuts at home is surprisingly simple and can be a fun activity for the whole family. Whether you’re hosting a party or just want a tasty snack, these mini desserts are easy to whip up and sure to be a hit!
Ingredients
- 1 cup all-purpose flour
- 1/4 cup granulated sugar
- 1 teaspoon baking powder
- 1/4 teaspoon salt
- 1/2 teaspoon vanilla extract
- 1/2 cup milk
- 1 large egg
- 2 tablespoons melted butter
- 1 cup powdered sugar
- 2 tablespoons milk (for glaze)
- Food coloring (optional)
- Sprinkles (optional)
Instructions
- Preheat the Oven: Start by preheating your oven to 350°F (175°C) and greasing a mini donut pan.
- Mix Dry Ingredients: In a bowl, whisk together flour, sugar, baking powder, and salt.
- Combine Wet Ingredients: In another bowl, combine milk, egg, melted butter, and vanilla extract. Mix well.
- Combine Mixtures: Pour the wet ingredients into the dry ingredients and stir until just combined.
- Fill the Pan: Using a piping bag or spoon, fill each cavity of the mini donut pan about halfway with the batter.
- Bake: Bake for 8-10 minutes, or until golden brown. Let them cool in the pan for a few minutes before transferring to a wire rack.
- Prepare the Glaze: In a bowl, mix powdered sugar with 2 tablespoons of milk until smooth. Add food coloring if desired.
- Glaze the Donuts: Dip the top of each cooled mini donut into the glaze and let excess drip off. Add sprinkles if desired.
- Serve: Enjoy your mini donuts fresh or store them in an airtight container!
Mini Tiramisu Cups
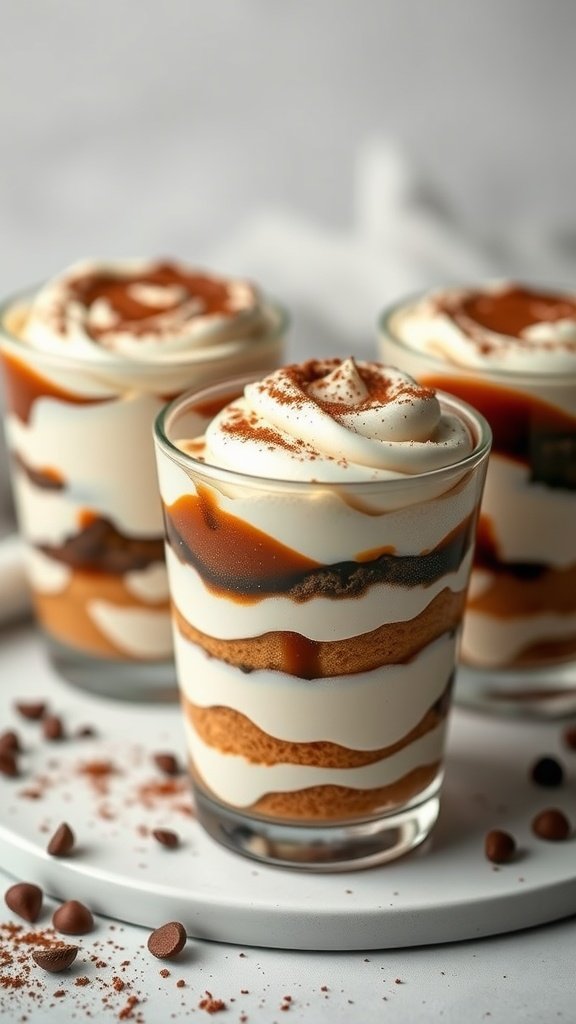
Mini tiramisu cups are a delightful twist on the classic Italian dessert, combining layers of creamy mascarpone and coffee-soaked ladyfingers into perfect little servings. They are rich, sweet, and boast a wonderful coffee flavor balanced with a light texture that makes them hard to resist. These mini desserts are not only delicious but also super easy to prepare, making them a great choice for gatherings or a sweet treat after dinner.
Building these cups is a breeze, and you can customize them with your favorite toppings. Whether it’s a dusting of cocoa powder or a drizzle of chocolate sauce, there’s plenty of room for creativity. They can also be made ahead of time, allowing the flavors to meld beautifully. Let’s get to the recipe!
Ingredients
- 1 cup strong brewed coffee, cooled
- 2 tablespoons coffee liqueur (optional)
- 8 ounces mascarpone cheese
- 1 cup heavy whipping cream
- 1/2 cup powdered sugar
- 1 teaspoon vanilla extract
- 24 ladyfingers
- Cocoa powder for dusting
- Chocolate sauce for drizzling (optional)
Instructions
- Prepare the Coffee: In a shallow dish, mix the cooled coffee with coffee liqueur, if using.
- Make the Cream: In a mixing bowl, beat the heavy cream with powdered sugar and vanilla extract until soft peaks form. Gently fold in the mascarpone cheese until well blended.
- Layer the Cups: Dip each ladyfinger quickly into the coffee mixture, then layer them at the bottom of each serving cup. Add a layer of the mascarpone mixture on top.
- Repeat Layers: Continue to layer dipped ladyfingers and mascarpone cream until the cups are filled, finishing with a layer of the cream on top.
- Chill and Serve: Refrigerate the cups for at least 2 hours to allow the flavors to meld. Before serving, dust with cocoa powder and drizzle with chocolate sauce, if desired.
Chocolate Chip Cookie Shots
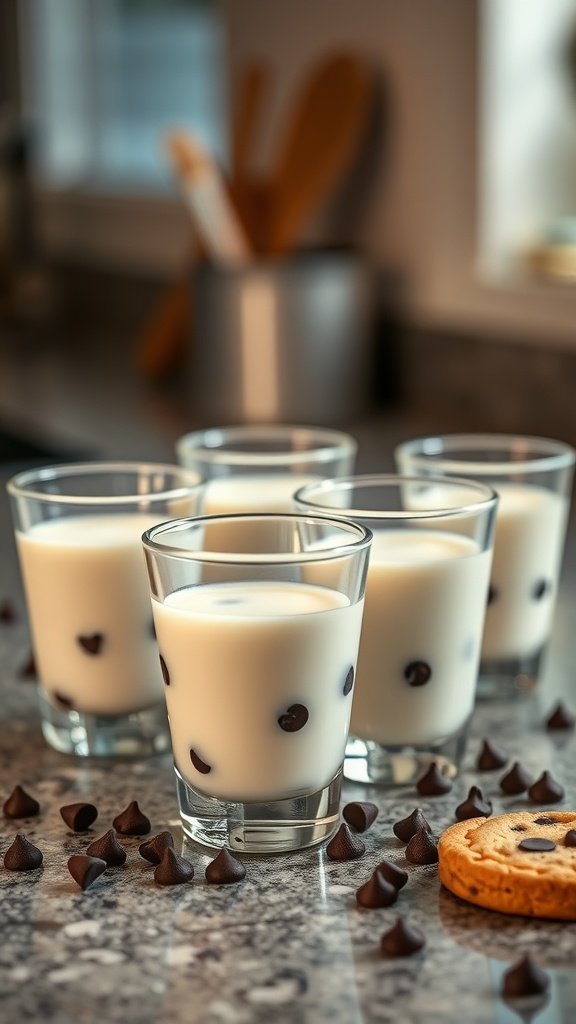
Chocolate chip cookie shots are a fun twist on traditional desserts, combining the classic flavors of chocolate chip cookies with an exciting serving style. Imagine crunchy cookie cups filled with cold milk or a creamy dessert, creating a delightful experience in every sip. These mini desserts are not only tasty but also incredibly simple to make, making them perfect for any gathering.
With a crunchy exterior and a soft, sweet filling, these cookie shots are sure to impress your friends and family. They capture the essence of childhood treats while adding a unique flair that makes them a hit at parties or as a special treat at home. If you’re looking to elevate your dessert game, give these cookie shots a try!
Ingredients
- 1 cup all-purpose flour
- 1/2 teaspoon baking soda
- 1/4 teaspoon salt
- 1/2 cup unsalted butter, softened
- 1/2 cup granulated sugar
- 1/4 cup brown sugar, packed
- 1 teaspoon vanilla extract
- 1 large egg
- 1 cup chocolate chips
- Milk or your favorite filling
Instructions
- Preheat your oven to 350°F (175°C) and grease a muffin tin.
- In a bowl, mix together the flour, baking soda, and salt. Set aside.
- In another bowl, cream the butter, granulated sugar, brown sugar, and vanilla until smooth. Beat in the egg.
- Gradually add the dry ingredients to the wet mixture, stirring until just combined. Fold in the chocolate chips.
- Scoop the dough into the muffin tin, shaping it to create cup-like forms. Bake for about 10-12 minutes until golden.
- Let the cookie cups cool slightly before removing them from the tin. Fill each cup with milk or your choice of filling and enjoy!
Mini Cheesecake Pops
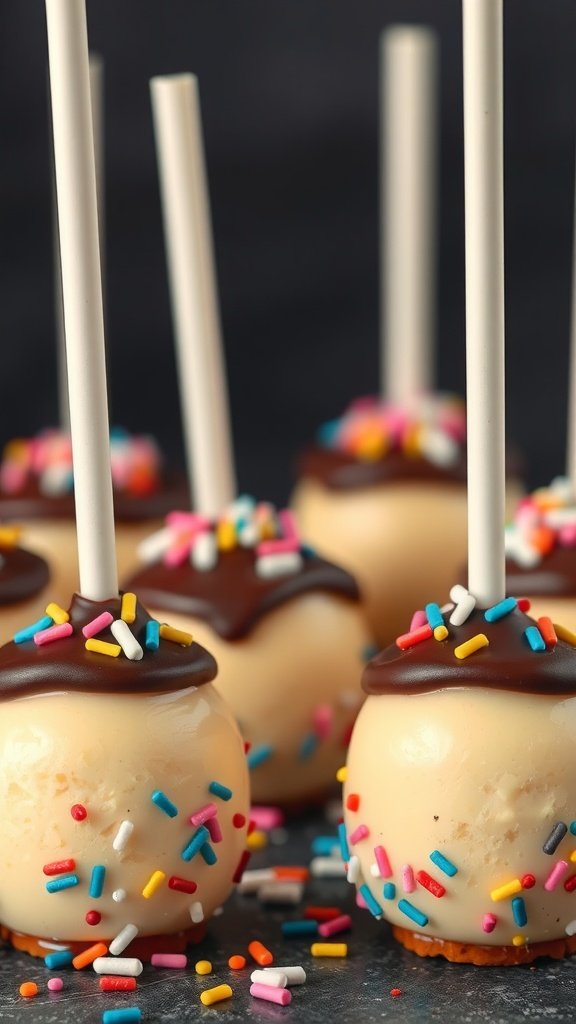
Mini Cheesecake Pops are a delightful twist on traditional cheesecake, offering a fun and portable way to enjoy this creamy dessert. With a smooth cheesecake filling coated in rich chocolate and sprinkled with colorful toppings, these mini desserts are as tasty as they are adorable. They’re perfect for parties, celebrations, or just a sweet treat at home!
These pops are surprisingly simple to make and can be customized to suit your favorite flavors and toppings. Whether you’re a cheesecake lover or just looking for an easy dessert to impress your friends, Mini Cheesecake Pops will surely hit the spot!
Ingredients
- 8 oz cream cheese, softened
- 1/2 cup powdered sugar
- 1 teaspoon vanilla extract
- 1 cup crushed graham crackers
- 1/2 cup chocolate chips
- 1 tablespoon coconut oil
- Sprinkles, for decoration
- Pop sticks or lollipop sticks
Instructions
- In a mixing bowl, beat the cream cheese, powdered sugar, and vanilla extract until smooth and creamy.
- Stir in the crushed graham crackers until well combined.
- Using your hands, roll the mixture into small balls and place them on a parchment-lined baking sheet. Insert a pop stick into each ball.
- Freeze for about 1-2 hours, or until firm.
- In a microwave-safe bowl, melt the chocolate chips with coconut oil until smooth, stirring every 30 seconds.
- Dip each frozen cheesecake pop into the melted chocolate, allowing excess to drip off, then sprinkle with toppings.
- Place back on the parchment paper and let the chocolate set before serving.
Mini Red Velvet Cupcakes

Mini red velvet cupcakes are a delightful twist on the classic dessert, combining a rich cocoa flavor with a vibrant red hue. Topped with smooth cream cheese frosting, they offer a perfect balance of sweetness and tang. These little treats are simple to make, making them ideal for any occasion, from birthday parties to casual get-togethers.
The moist texture and inviting flavor of red velvet, paired with the creamy frosting, make these mini desserts a crowd-pleaser. They’re not just cute; they’re deliciously satisfying! Plus, their bite-sized nature allows for guilt-free indulgence.
Ingredients
- 1 1/4 cups all-purpose flour
- 1 teaspoon baking soda
- 1 teaspoon cocoa powder
- 1/2 teaspoon salt
- 1/2 cup vegetable oil
- 1 cup granulated sugar
- 1 large egg
- 1 tablespoon red food coloring
- 1 teaspoon vanilla extract
- 1/2 cup buttermilk
- 1/2 teaspoon white vinegar
Instructions
- Preheat your oven to 350°F (175°C) and line a mini cupcake pan with liners.
- In a medium bowl, whisk together flour, baking soda, cocoa powder, and salt.
- In a larger bowl, mix together the vegetable oil and sugar until well combined. Add in the egg, red food coloring, and vanilla extract, mixing until smooth.
- Alternate adding the dry ingredients and buttermilk to the wet mixture, starting and ending with the dry ingredients. Stir until just combined, then add the vinegar and mix gently.
- Fill each cupcake liner about 2/3 full with the batter. Bake for 12-15 minutes or until a toothpick comes out clean.
- Let the cupcakes cool completely before frosting with your favorite cream cheese frosting.
Petite Berry Crumbles
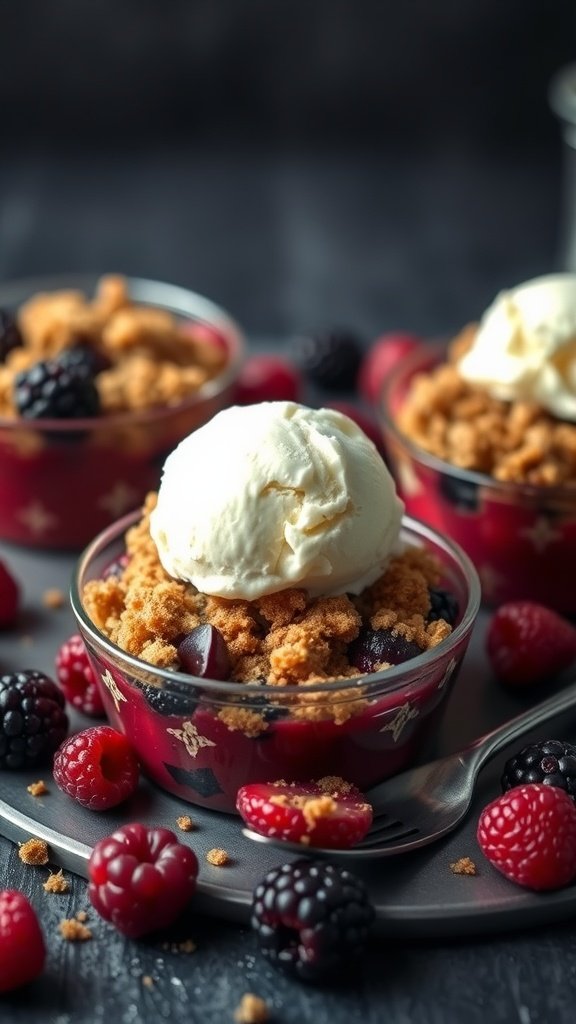
Petite berry crumbles are a delightful way to enjoy a mix of sweet and tart flavors in a bite-sized dessert. These mini desserts pair juicy berries with a crispy crumb topping, creating a balance that keeps you coming back for more. Simple to prepare, they make for a fantastic addition to any gathering, or even as a treat just for yourself!
The combination of fresh berries, like raspberries and blackberries, with a buttery crumble makes these treats irresistible. Top them off with a scoop of vanilla ice cream, and you have a lovely dessert that feels special without requiring hours in the kitchen. Let’s dive into this easy recipe that will surely impress!
Ingredients
- 2 cups mixed berries (raspberries, blackberries, blueberries)
- 1 tablespoon sugar
- 1 teaspoon lemon juice
- 1/2 cup all-purpose flour
- 1/2 cup rolled oats
- 1/3 cup brown sugar
- 1/4 cup unsalted butter, melted
- 1/2 teaspoon cinnamon
- Vanilla ice cream (for serving)
Instructions
- Preheat your oven to 350°F (175°C). In a mixing bowl, combine the berries, sugar, and lemon juice. Gently toss until the berries are well coated and set aside.
- In another bowl, mix flour, oats, brown sugar, cinnamon, and melted butter until crumbly. This will be your topping.
- In small baking dishes or ramekins, divide the berry mixture evenly. Then sprinkle the crumble topping generously over the berries.
- Bake for about 20-25 minutes or until the topping is golden brown and the berries are bubbling.
- Let them cool slightly before serving with a scoop of vanilla ice cream on top.
Lavender Shortbread Cookies
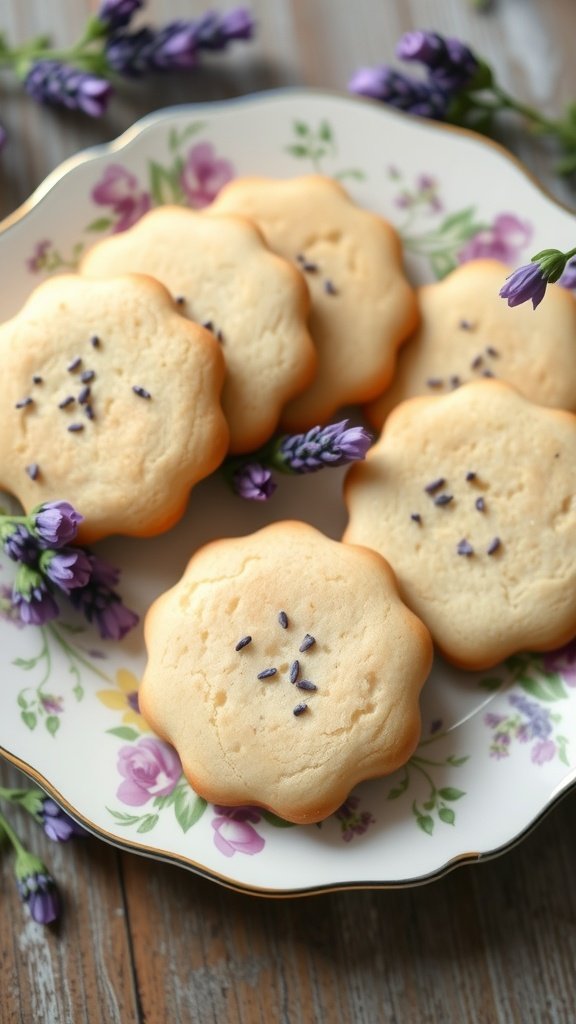
Lavender shortbread cookies are a delightful treat that brings a hint of floral elegance to your mini desserts collection. These cookies are buttery, crumbly, and infused with the aromatic flavor of lavender, making them a unique addition to any dessert table. With simple ingredients and straightforward steps, this recipe is perfect for both novice bakers and seasoned pros.
The subtle taste of lavender pairs beautifully with the richness of the shortbread, offering a refreshing twist that’s sure to surprise and please your taste buds. Whether you serve them at a tea party or enjoy them with a cup of coffee, these cookies are sure to be a hit!
Ingredients
- 1 cup unsalted butter, softened
- 1/2 cup powdered sugar
- 1 teaspoon vanilla extract
- 2 cups all-purpose flour
- 1 tablespoon dried culinary lavender
- 1/4 teaspoon salt
Instructions
- Preheat the Oven: Start by preheating your oven to 350°F (175°C) and line a baking sheet with parchment paper.
- Make the Dough: In a mixing bowl, cream together the softened butter and powdered sugar until light and fluffy. Add the vanilla extract and mix well.
- Combine Dry Ingredients: In another bowl, whisk together the flour, dried lavender, and salt. Gradually add the dry mixture to the butter mixture, combining until a soft dough forms.
- Shape the Cookies: Roll the dough into small balls and place them on the prepared baking sheet. Flatten each ball slightly with the bottom of a glass or your hand.
- Bake: Bake in the preheated oven for 12-15 minutes, or until the edges are lightly golden. Allow them to cool on the baking sheet for a few minutes before transferring to a wire rack to cool completely.
Mini Pecan Pies
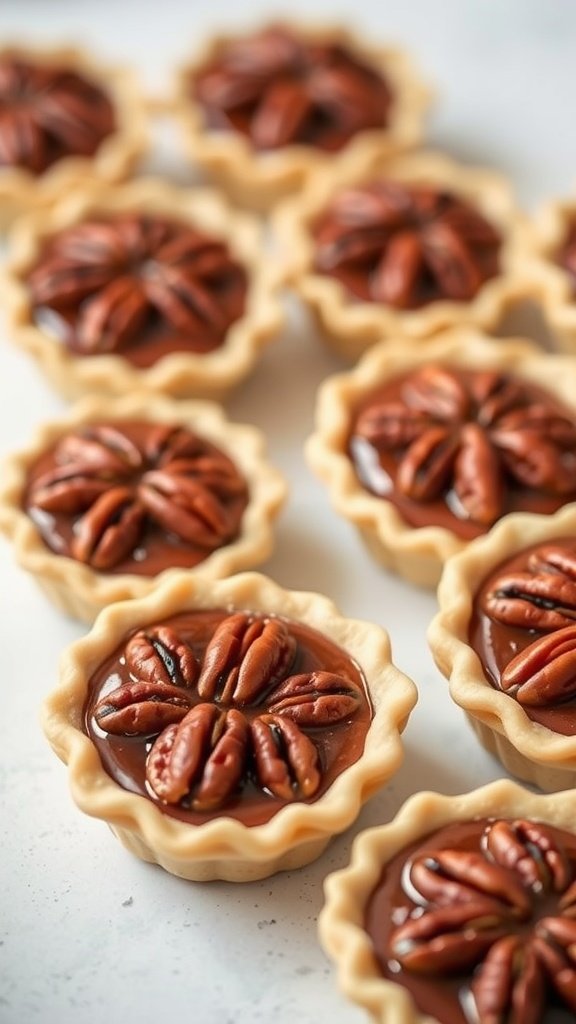
Mini pecan pies are a delightful twist on the traditional dessert, offering all the rich, nutty flavor in a smaller, more manageable size. These mini desserts are perfect for parties or family gatherings, allowing guests to indulge without feeling overwhelmed by a large slice. With their buttery crust and sweet, gooey filling topped with crunchy pecans, they strike a lovely balance between sweetness and nuttiness.
Making mini pecan pies is quite simple, even for those who may not consider themselves skilled bakers. You can whip up a batch in no time, and they bake quickly, which is a bonus when you need a tasty treat in a hurry. Here’s an easy recipe to get you started!
Ingredients
- 1 cup pecans, chopped
- 1/2 cup brown sugar
- 1/2 cup corn syrup
- 3 large eggs
- 2 tablespoons unsalted butter, melted
- 1 teaspoon vanilla extract
- 1/4 teaspoon salt
- 1 package of pre-made mini pie crusts
Instructions
- Preheat your oven to 350°F (175°C).
- In a mixing bowl, whisk together the brown sugar, corn syrup, eggs, melted butter, vanilla extract, and salt until well combined.
- Stir in the chopped pecans until evenly distributed.
- Place the mini pie crusts on a baking sheet and fill each crust with the pecan mixture, being careful not to overfill.
- Bake in the preheated oven for 20-25 minutes, or until the filling is set and the edges of the crusts are lightly golden.
- Allow to cool slightly before serving. Enjoy your mini pecan pies warm or at room temperature!
Decadent Mini Cheesecakes
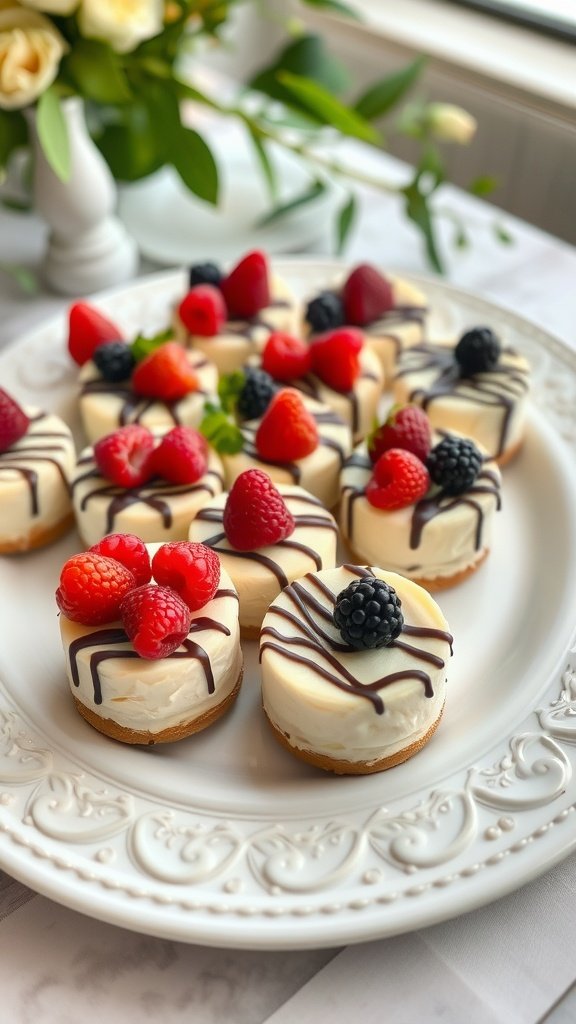
These mini cheesecakes are a delightful treat that packs all the creamy goodness of traditional cheesecake into a bite-sized dessert. Each little cheesecake is rich and smooth, topped with fresh berries and a drizzle of chocolate, making them both beautiful and delicious. Plus, they’re surprisingly easy to make, perfect for gatherings or just a sweet indulgence at home.
With a buttery graham cracker crust, a luscious filling, and colorful toppings, these mini desserts are sure to impress. Whether you’re entertaining guests or enjoying a quiet night in, these cheesecakes are an inviting way to satisfy your sweet tooth.
Ingredients
- 1 cup graham cracker crumbs
- 1/4 cup granulated sugar
- 1/4 cup unsalted butter, melted
- 16 oz cream cheese, softened
- 1/2 cup powdered sugar
- 1 teaspoon vanilla extract
- 1 cup heavy cream
- Fresh raspberries and blackberries for topping
- Chocolate syrup for drizzling
Instructions
- Preheat the oven to 325°F (160°C) and line a muffin tin with paper liners.
- In a bowl, mix the graham cracker crumbs, granulated sugar, and melted butter until combined. Press the mixture evenly into the bottom of each muffin liner.
- In another bowl, beat the cream cheese until smooth. Gradually add the powdered sugar and vanilla, mixing until well combined.
- In a separate bowl, whip the heavy cream until soft peaks form. Gently fold the whipped cream into the cream cheese mixture until smooth.
- Spoon the cream cheese mixture over the crust in each muffin liner. Smooth the tops and refrigerate for at least 2 hours to set.
- Once set, remove from the muffin tin and top with fresh berries and a drizzle of chocolate syrup before serving.
Mini Chocolate Chip Muffins

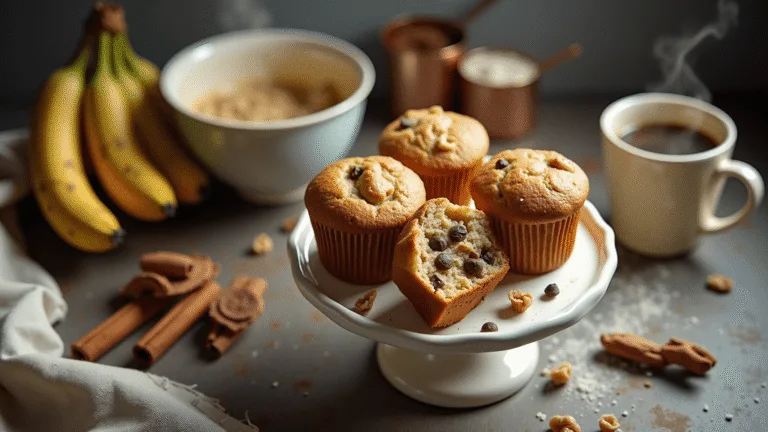
Mini chocolate chip muffins are a delightful treat that combines a soft, fluffy texture with the rich flavor of chocolate. These bite-sized goodies are perfect for snacking or serving at gatherings, and they are surprisingly simple to whip up. Each muffin is packed with chocolate chips, making them a sweet indulgence that everyone will love.
What’s great about this recipe is that it requires common pantry ingredients, so you can easily make them whenever the craving hits. Plus, their mini size makes them a fun option for dessert tables or lunchboxes. Let’s dive into making these tasty mini desserts!
Ingredients
- 1 cup all-purpose flour
- 1/2 cup granulated sugar
- 1/2 teaspoon baking powder
- 1/4 teaspoon baking soda
- 1/4 teaspoon salt
- 1/2 cup unsalted butter, melted
- 1 large egg
- 1/2 teaspoon vanilla extract
- 1/2 cup chocolate chips
Instructions
- Preheat the Oven: Start by preheating your oven to 350°F (175°C) and lining a mini muffin tin with paper liners.
- Mix Dry Ingredients: In a large bowl, whisk together flour, sugar, baking powder, baking soda, and salt until well combined.
- Combine Wet Ingredients: In another bowl, mix melted butter, egg, and vanilla until fully blended.
- Combine Mixtures: Pour the wet mixture into the dry ingredients and stir gently until just combined. Be careful not to overmix.
- Add Chocolate Chips: Fold in the chocolate chips evenly throughout the batter.
- Fill Muffin Tin: Spoon the batter into the prepared muffin tin, filling each cup about 2/3 full.
- Bake: Bake for 10-12 minutes or until a toothpick inserted into the center comes out clean.
- Cool: Allow the muffins to cool in the tin for a few minutes before transferring to a wire rack to cool completely.
This post may contain affiliate links. Please see my disclosure policy for details.


