The Best Fluffy Pancakes recipe you will fall in love with. Full of tips and tricks to help you make the best pancakes.

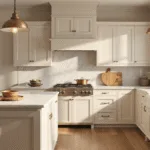
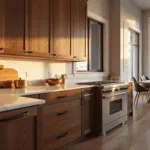
How to Paint Kitchen Cabinets Like a Pro: A Foolproof DIY Guide
Contents
Hey there, kitchen makeover enthusiast!
Ready to transform your tired, dated kitchen cabinets without breaking the bank? I’ve got the ultimate step-by-step guide that’ll turn you into a cabinet painting ninja.

Why Paint Your Kitchen Cabinets?
Let’s be real. Kitchen renovations can cost a fortune. But painting your cabinets? That’s a game-changer. For just a few hundred bucks and some elbow grease, you can:
- Completely refresh your kitchen’s look
- Avoid costly cabinet replacement
- Boost your home’s resale value
- Express your personal style
What You’ll Need: The Ultimate Cabinet Painting Toolkit
Essential Supplies:
- Screwdriver
- Degreaser
- 220-grit sandpaper
- Painter’s tape
- Drop cloths
- High-quality primer
- Cabinet paint
- Angled paintbrush
- Foam roller
- Clean rags

The Step-by-Step Cabinet Painting Process
Step 1: Prep Like a Pro
Disassemble Everything
- Remove all cabinet doors and drawers
- Take off hardware (hinges, knobs, pulls)
- Label everything so reassembly is a breeze
Pro Tip: Use painter’s tape to protect surrounding surfaces. Trust me, you don’t want paint on your countertops!
Step 2: Deep Clean is Key
Grease is the enemy of a smooth paint job.
Cleaning Checklist:
- Use a heavy-duty degreaser like Krud Kutter
- Wipe down ALL surfaces thoroughly
- Let everything dry completely

Step 3: Sand for Success
Sanding isn’t optional – it’s crucial.
Sanding Technique:
- Use 220-grit sandpaper
- Sand lightly to create a slightly rough surface
- Wipe away all dust with a damp cloth
Step 4: Prime Time
Priming Secrets:
- Choose a high-quality primer designed for cabinets
- Use a foam roller for smooth surfaces
- Brush edges and detailed areas first
- Let primer dry completely

Step 5: Paint Like a Professional
Painting Pro Tips:
- Use premium cabinet paint (waterborne alkyd works best)
- Apply thin, even coats
- Use a combination of brush and roller
- Let each coat dry completely
- Plan for 2-3 coats for perfect coverage
Step 6: Reassemble with Care
- Wait 24-48 hours for paint to fully cure
- Reattach hardware
- Hang doors carefully

Common Mistakes to Avoid
- Skipping cleaning and sanding
- Using cheap paint
- Rushing between coats
- Not allowing proper drying time
Budget-Friendly Hacks
- Buy quality brushes, not expensive tools
- Paint in natural light
- Consider updating hardware for extra pizzazz
- Practice on a small cabinet first

When to Call a Pro
If your cabinets have:
- Extensive damage
- Complex molding
- Require significant repairs
Final Thoughts
Painting kitchen cabinets is totally doable. With patience, the right supplies, and this guide, you’ll create a kitchen that looks like it cost thousands – without the hefty price tag.
Remember: Preparation is 90% of a great paint job. Take your time, and you’ll love the results!
Happy painting! 🎨🏠

This post may contain affiliate links. Please see my disclosure policy for details.